How To Host Free Static Website On Azure Storage With Custom Domain And Free Razorops Ci Cd Pipeline
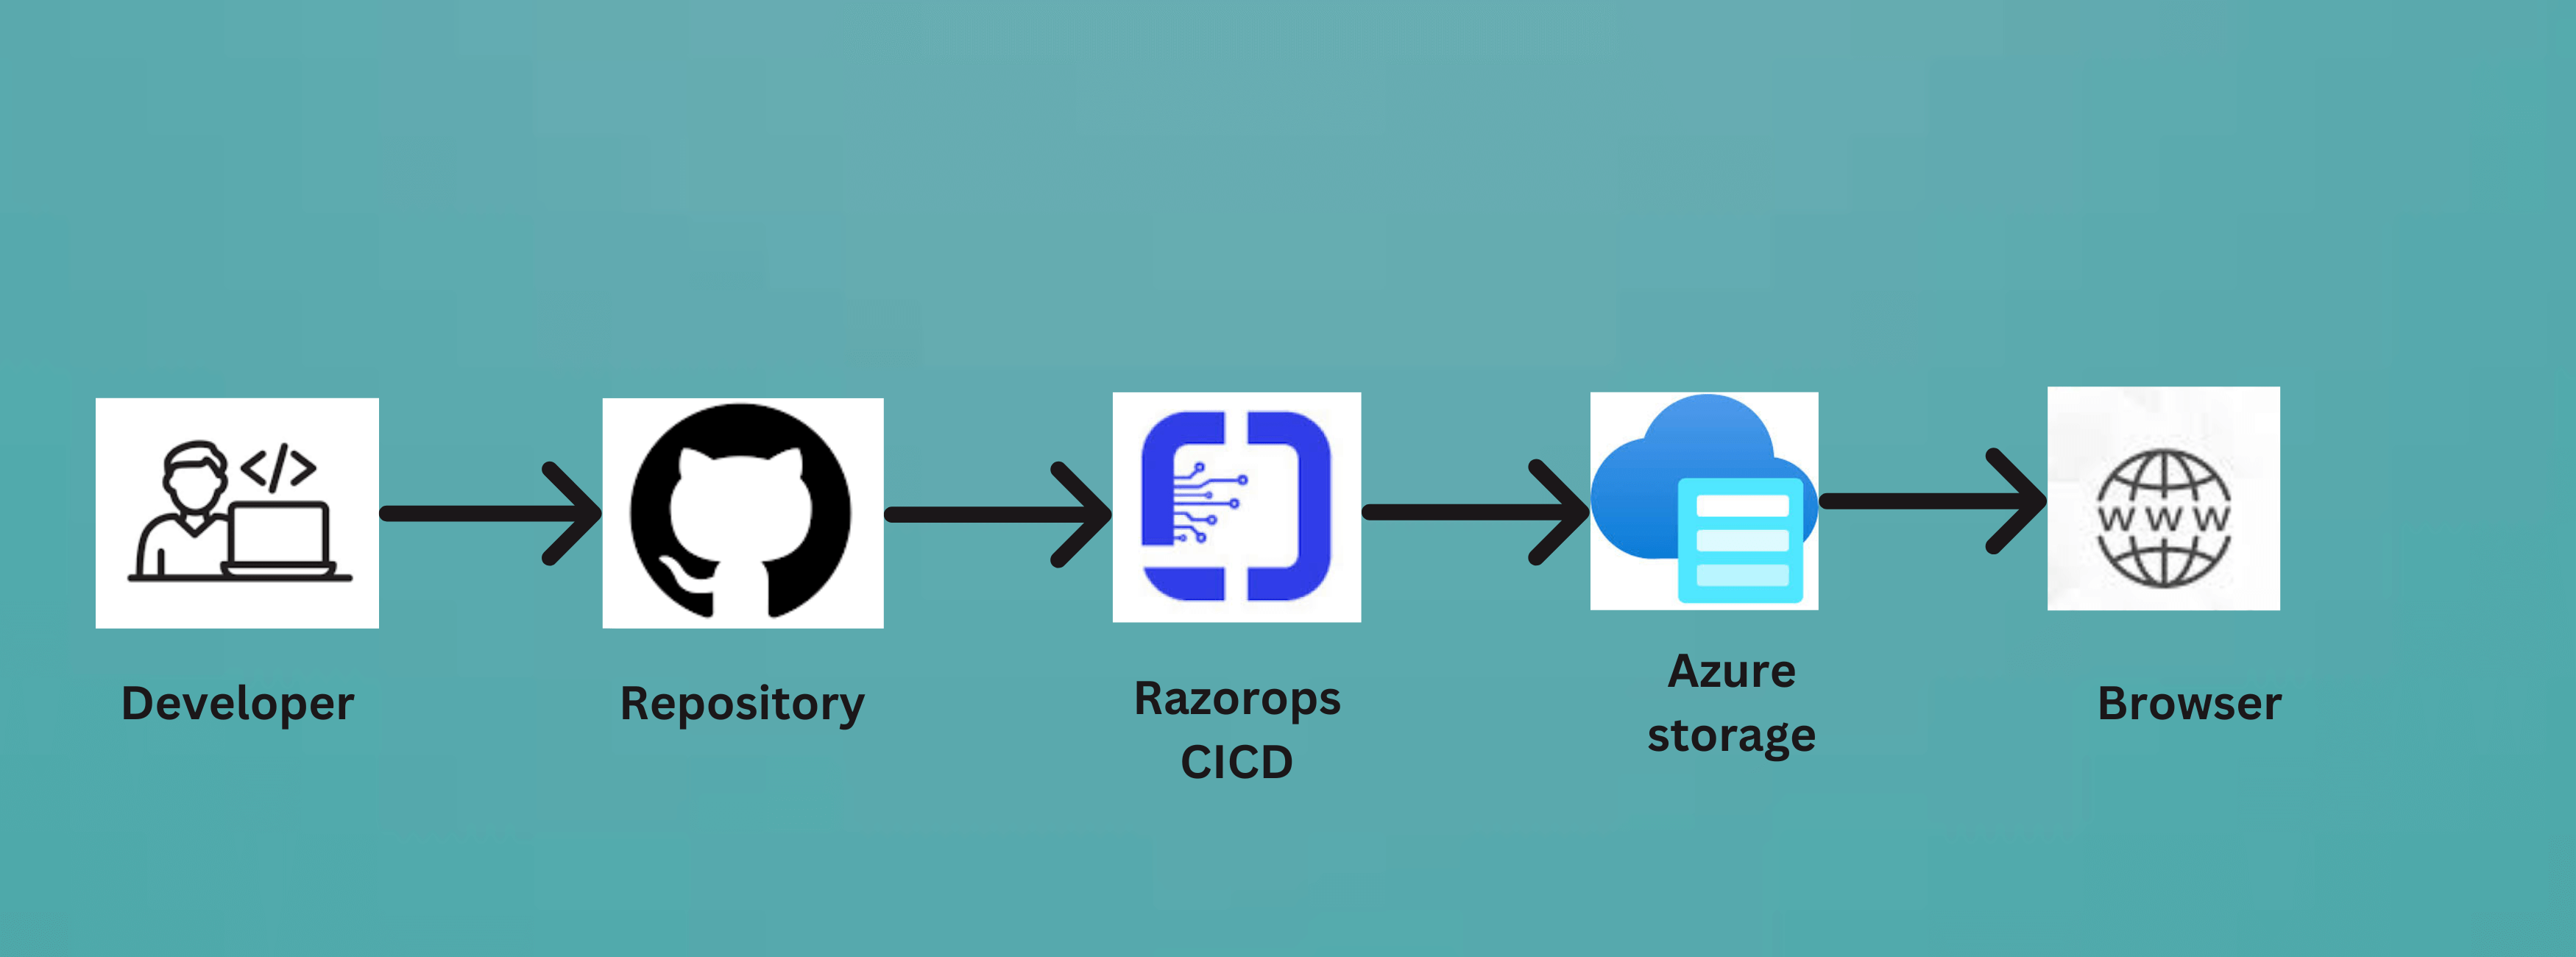
Table of contents:
Prerequisites:
- Azure account
- Razorops account
Part 1: Setting up azure storage account
- Set up Azure Storage Account
- Enable static website hosting on storage account
- Upload static files
Part 2: Configure Custom Domain and HTTPS with cloud flare
- Create a new CDN endpoint for custom domain
- Select storage static site as origin type for CDN endpoint
- Map custom domain to CDN endpoint using CNAME
- Configure Custom Domain and Enable HTTPS
Part 3: Setting up CI/CD with Razorops for Automatic Deployment
- Create a Razorops Yaml file
- Git push all files to Github or Bitbucket or Gitlab
- Integrate Github or Bitbucket or Gitlab account with Razorops
- Create and run Razorops CI/CD Pipeline
- Verify Deployment
Conclusion
In this tutorial, we go through the step by step procedure of hosting a static website on Azure storage with custom domain and setting up continuous Integration and deployment(CI/CD) using Razorops.
Part 1: Setting up azure storage account
Step 1: Sign in to the Azure Portal
- Navigate to the Azure Portal.
- Sign in with your Azure account.
3. Create a New Storage Account
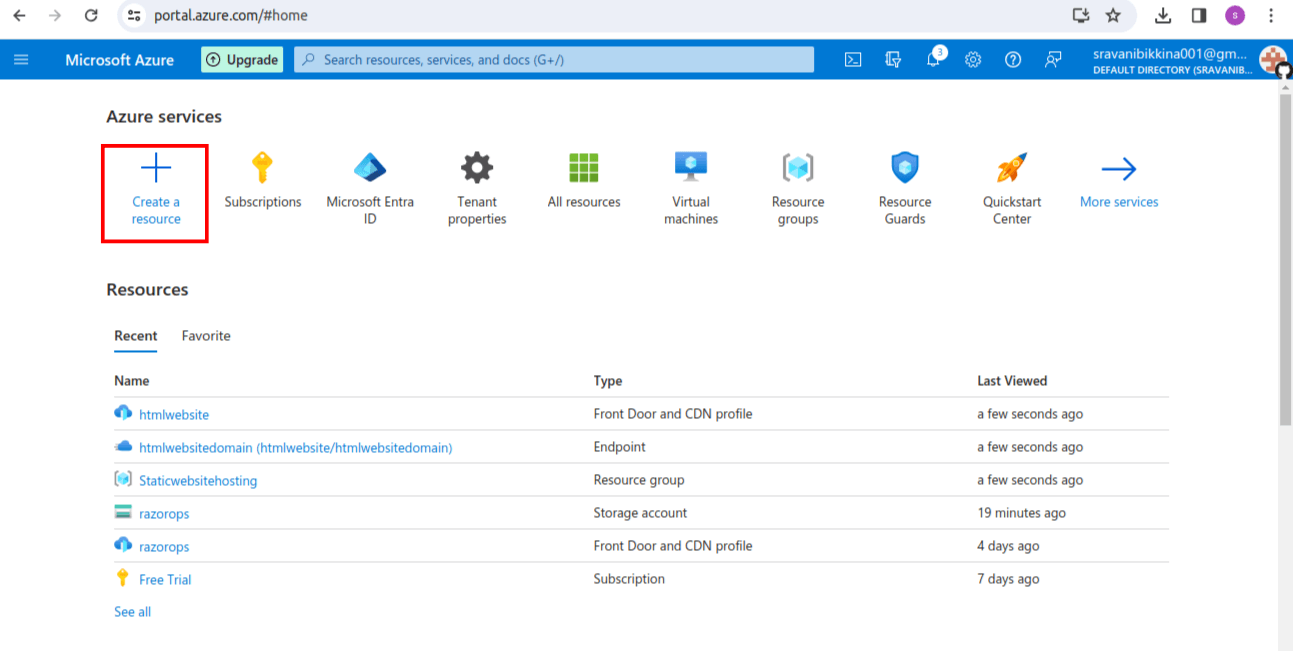
- In the Azure Portal, click on “Create a resource” in the left sidebar.
- Search for “Storage Account” and select it from the results. On the right side storage in categories and click the “Create” button.
4. Configure the Basics
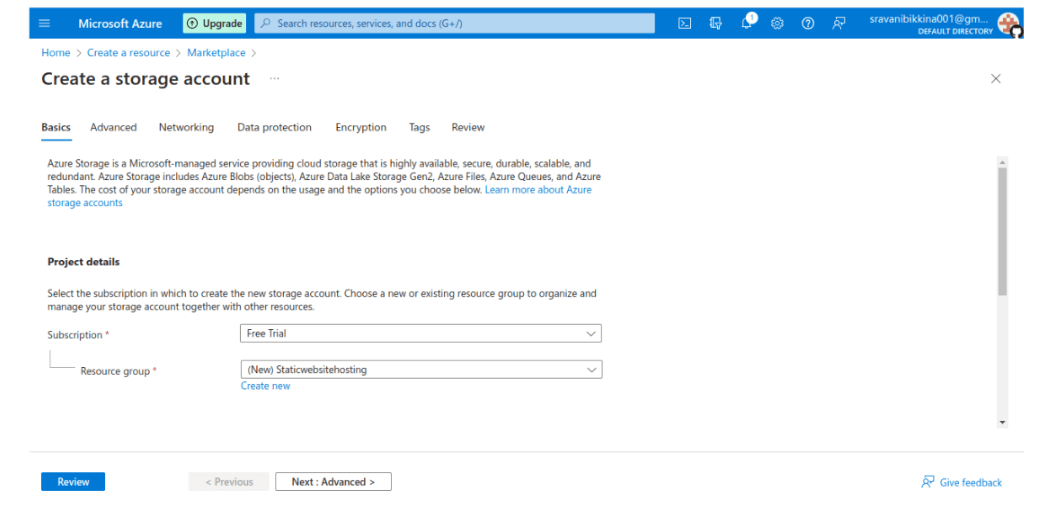
In the “Basics” tab of the “Create storage account” page:
- Subscription: Select your Azure subscription.
- Resource group: Create a new one or use an existing resource group.
- Storage account name: Choose a globally unique name.
- Region: Select the region for your storage account.
- Performance: Choose the desired performance tier (Standard or Premium).
5. Configure Advanced Settings
Navigate through the tabs to configure additional settings such as Networking, Data protection, Advanced, etc. Adjust according to your requirements.
6.Review and Create
- Review your configuration settings, and then click the “Review + create” tab.
- After reviewing, click the “Create” button to start the deployment process.
7. Wait for Deployment
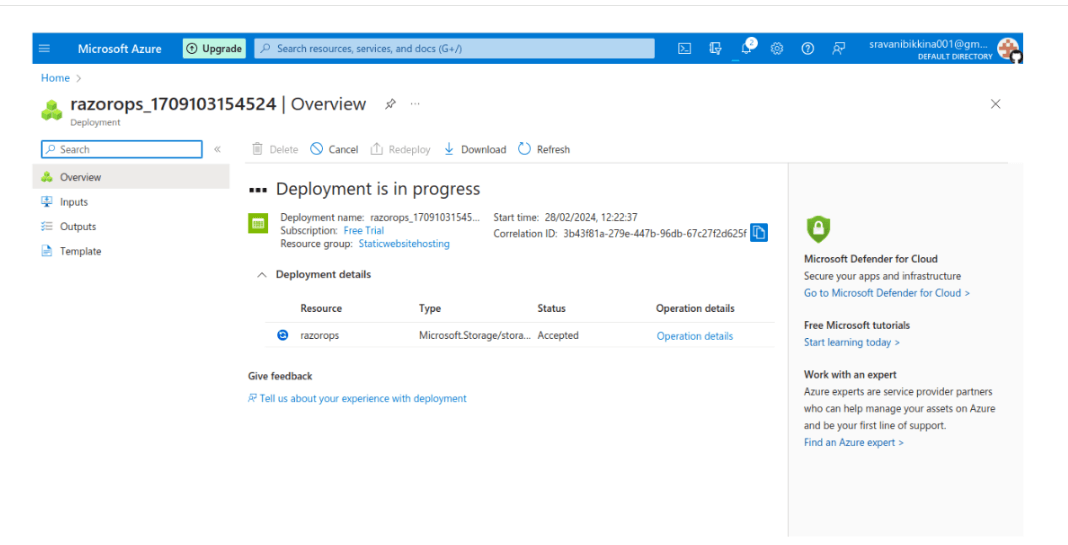
Wait for the deployment to complete. You can monitor the deployment progress in the “Notifications” section.
8. Access Storage Account
- Once the deployment is successful, go to the “Resource groups” section in the Azure Portal.
- Open the resource group you specified during the setup.
- Click on your newly created storage account to access its details.
Step 2: Enable static website hosting on storage account
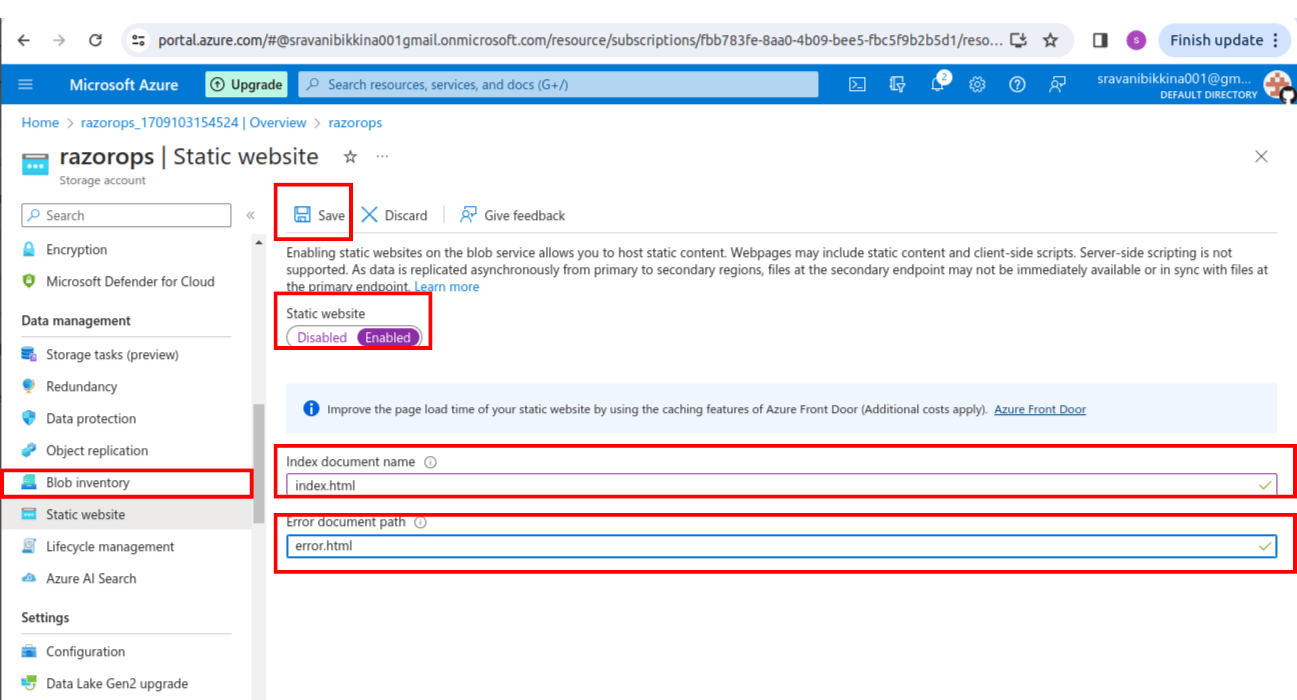
- In the storage account settings, navigate to the “Static website” section.
- Enable static website hosting.
- Type file names as index.html and error.html as shown below.
4. Obtain Access Keys
- In the storage account settings, navigate to the “Access keys” section.
- Copy one of the access keys. You will need this for programmatic access to your storage account.
Step 3: Upload static website files
Creating a static website involves creating HTML, CSS, and possibly JavaScript files that will be served directly without any server-side processing. Here is a simple guide to creating a basic static website:
1. Create HTML Files
Use a text editor (Visual Studio Code, Sublime Text, or Notepad) to create HTML files(Index.html, Error.html) for each page of your website.
2. Manually Deploy Static Website to Azure Storage
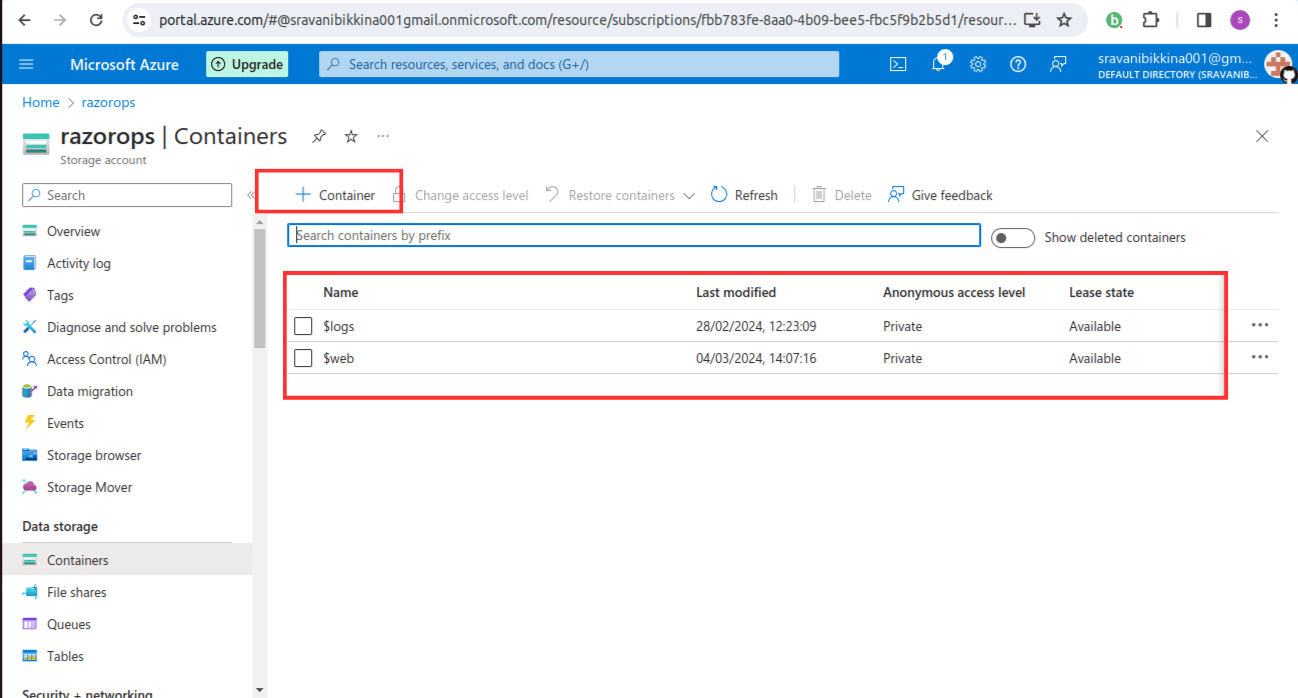
You can upload your HTML Files(Index.html and Error.html) and other files to the Azure Storage, by using Upload button in Azure portal UI.
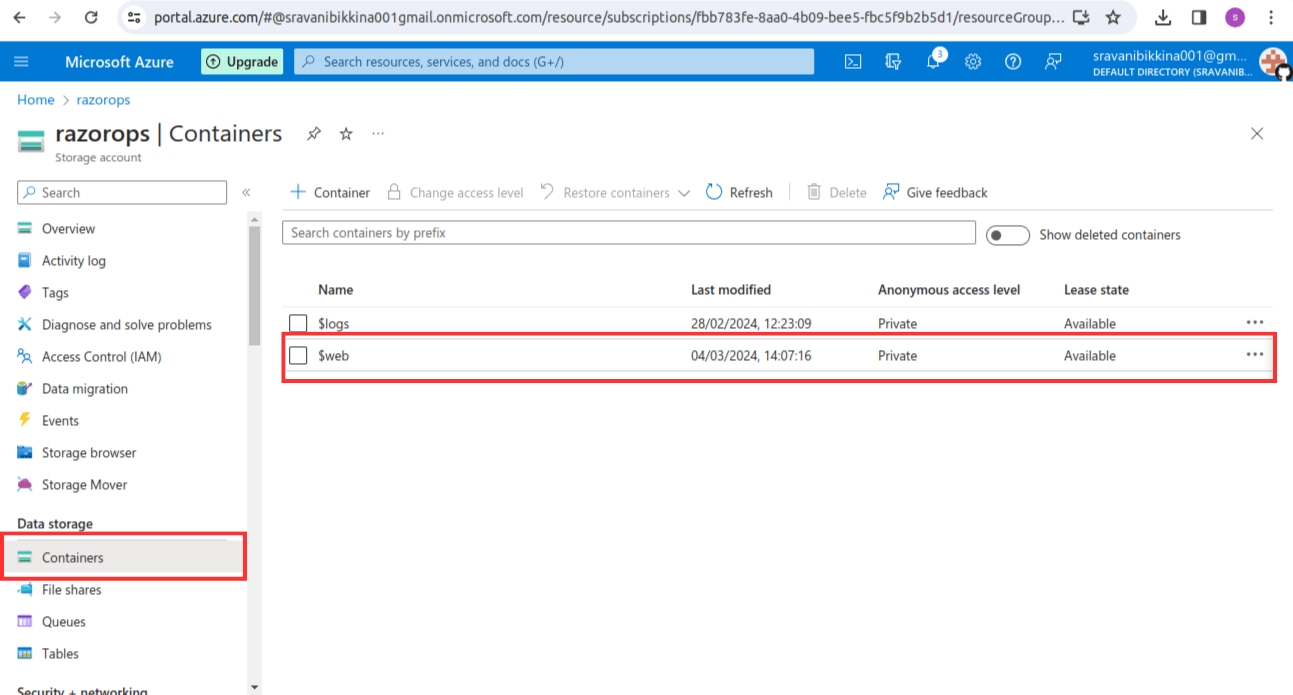
Go to the storage account and click on containers, where you can find $web. In $web upload index.html and error.html files. this file will be served when someone access the root url of your website.
3. Access Your Static Website
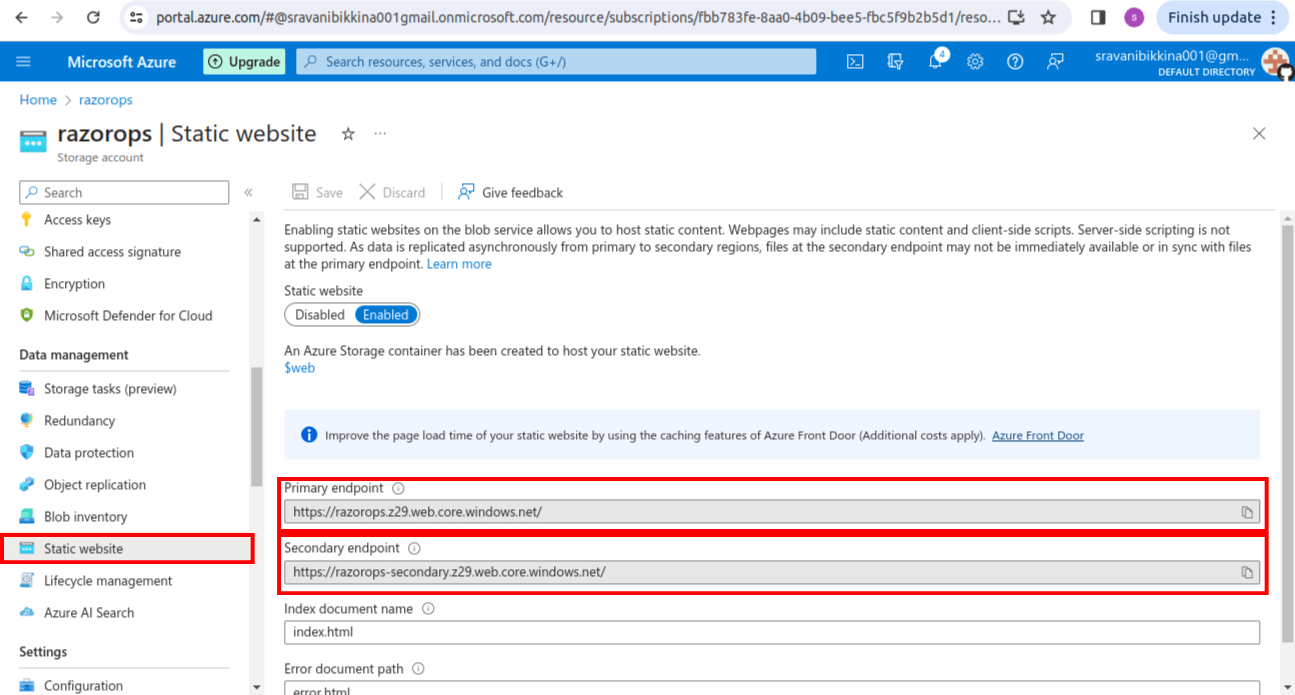
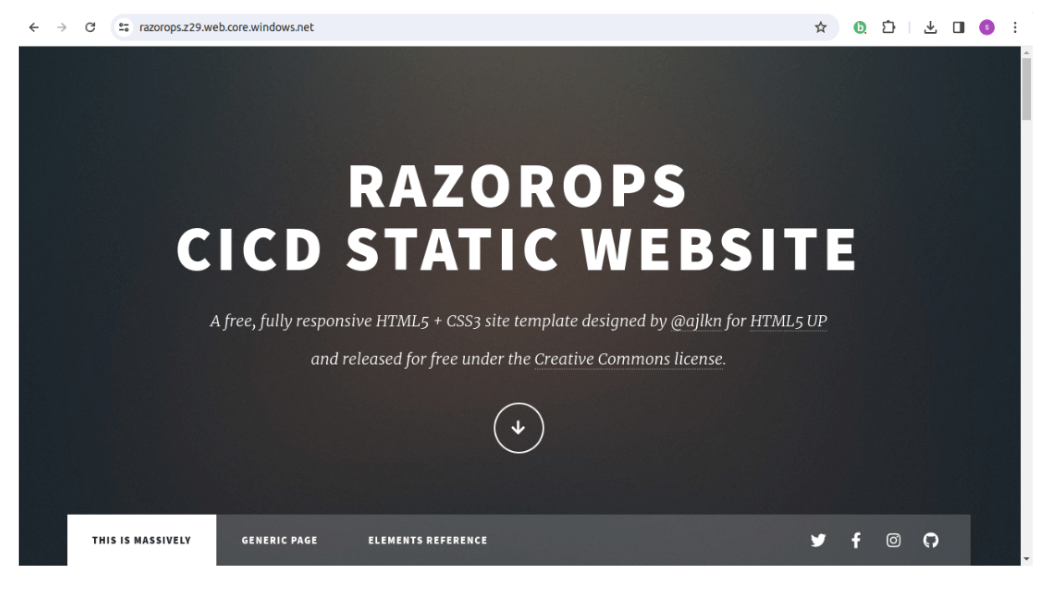
- Once the files are uploaded, your static website will be accessible using the primary endpoint URL.
- In the storage account’s left-hand menu,click on the static website section.
- From the overview page, copy the static site endpoint. Open it in web browser to verify if your static website is working or note
Part 2: Configuring a FREE Custom Domain and Enabling HTTPS with Azure CDN
A static website hosted on Azure Storage is already a great way to serve your content. But to take it a step further and enhance its functionality and performance, you can configure a custom domain and enable HTTPS using Azure CDN
Step 1: Create a new CDN endpoint for the custom domain
To start, you need to create a new Content Delivery Network(CDN) endpoint in Azure. This endpoint acts as a gateway between your custom domain and the underlying storage account hosting your static website.
- In the Azure portal, navigate to your resource group and click on “Add” to create a new resource.
- Search for “CDN” in the search bar and select “CDN” from the results.
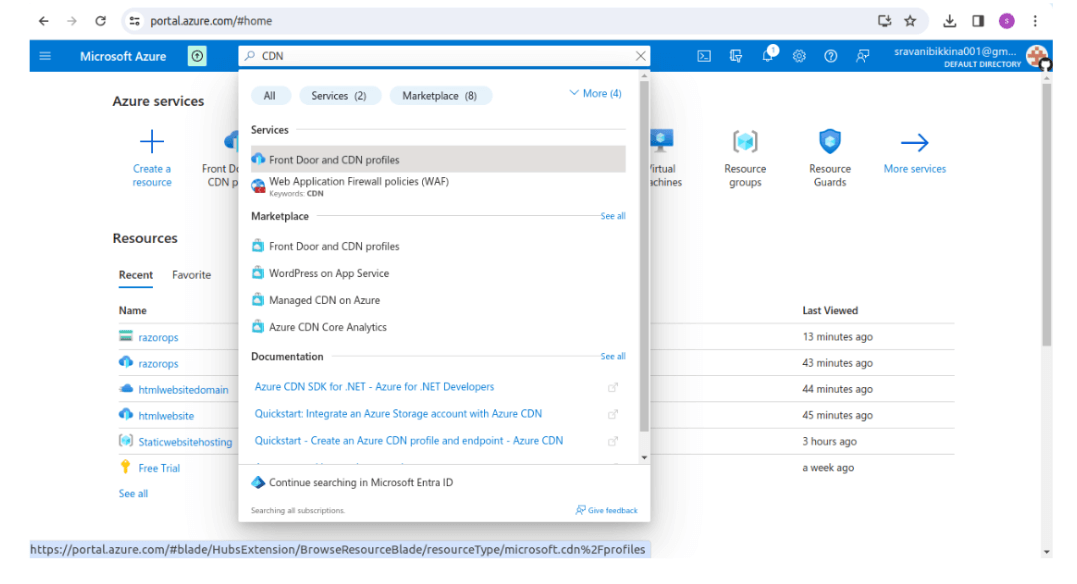
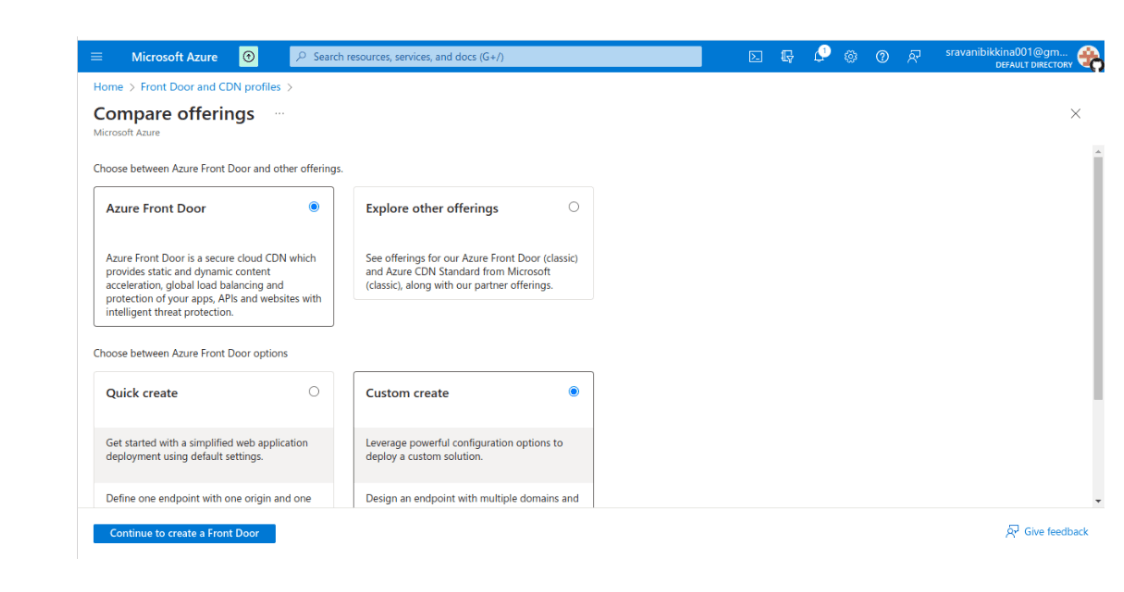
Step 2:- Select “Storage Static Site” as the origin type for the CDN endpoint
When configuring the CDN endpoint, you need to specify where it should fetch content from. In this case,we are using azure storage to host static website, we will select storage static site as origin type.
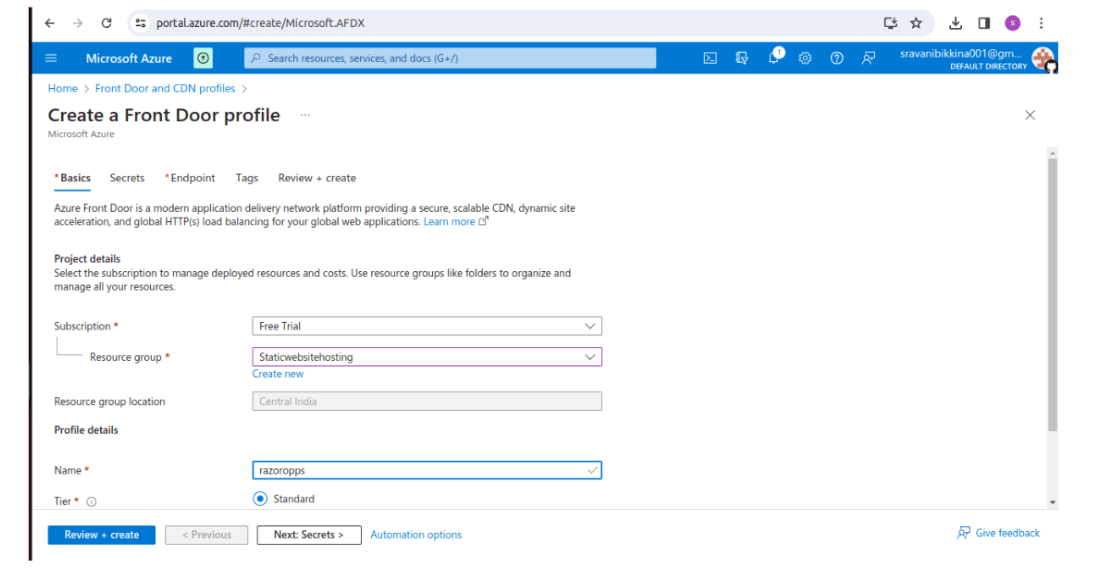
Step 3: Map the custom domain to the CDN endpoint using CNAME records
Now that you have set up your CDN endpoint, it’s time to map your custom domain to it. This involves adding CNAME (Canonical Name) records in your DNS settings that point your domain name to the CDN endpoint.
- Go to your domain service provider (e.g., cloudflare) and access the domain management settings for your custom domain.
- Look for the DNS settings or advanced DNS settings section.
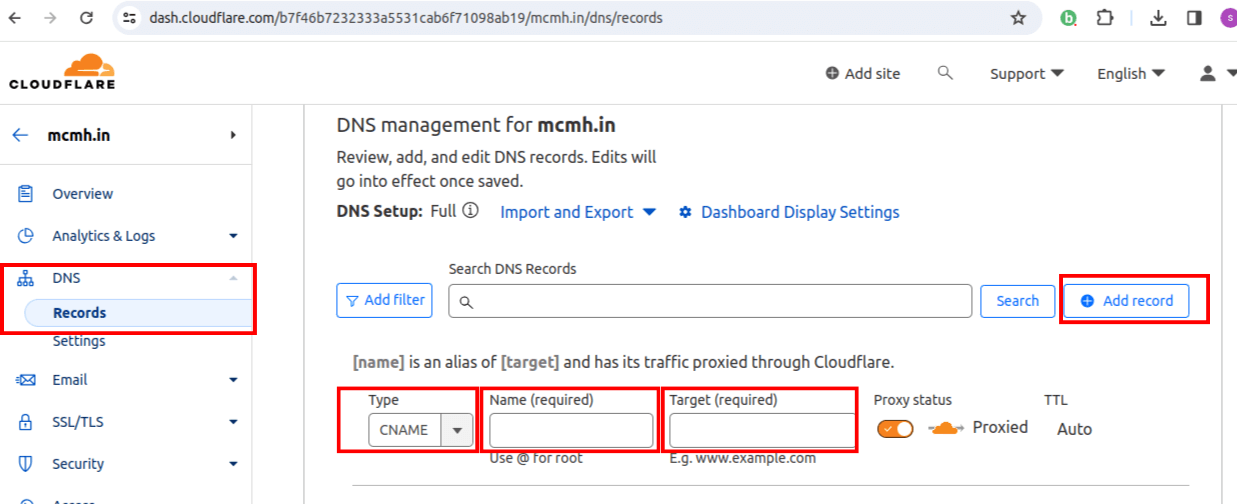
- Add CNAME records:
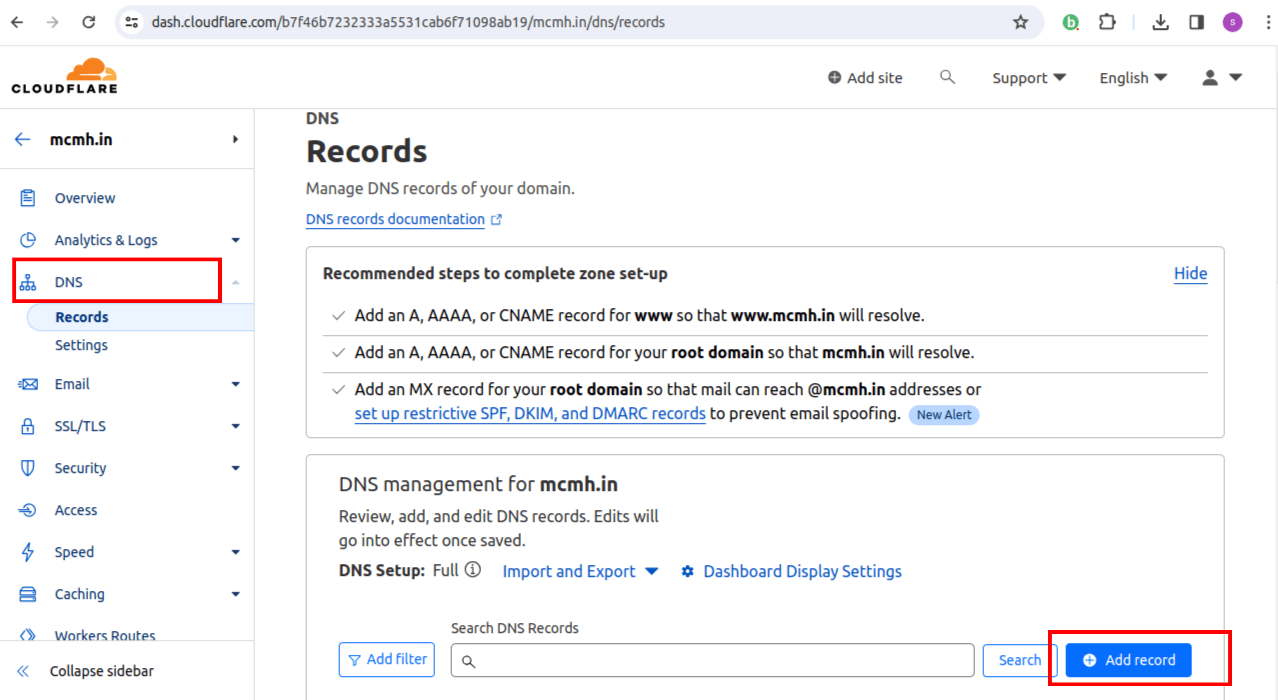
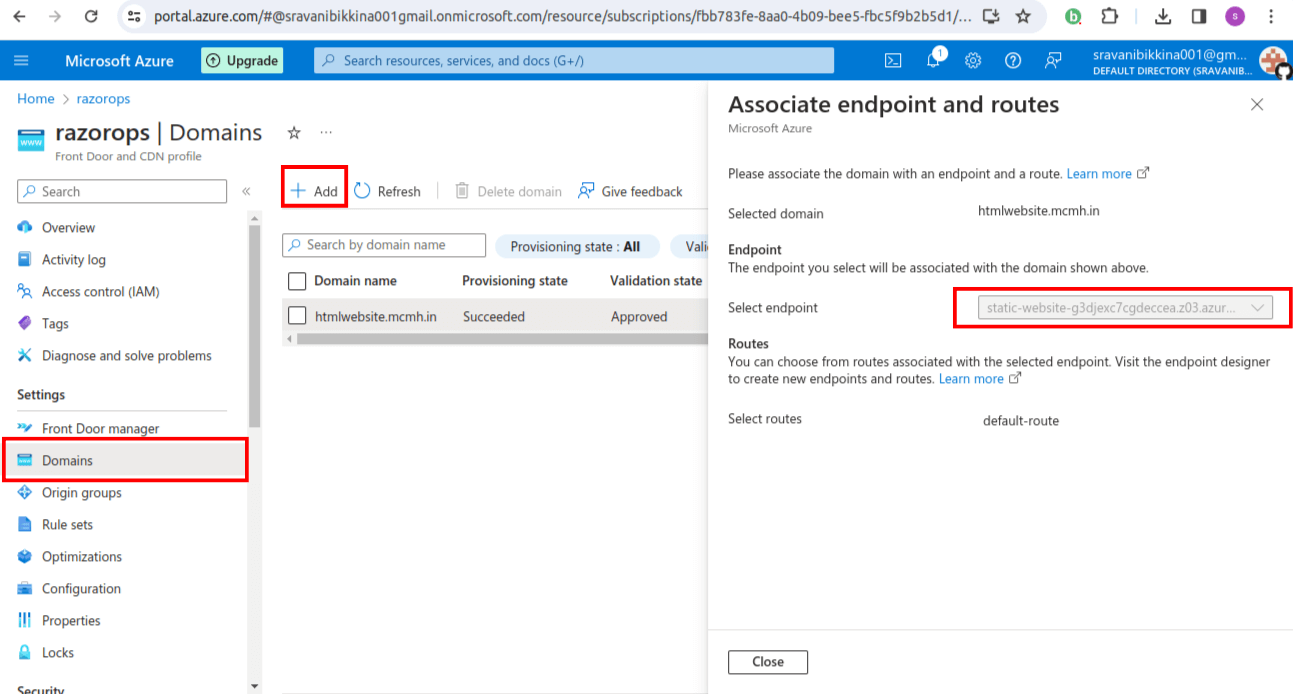
Select Type as CNAME, enter required name for your website(Example static website), In Target copy and enter the endpoint url provided in domain section of azure as provided in below image
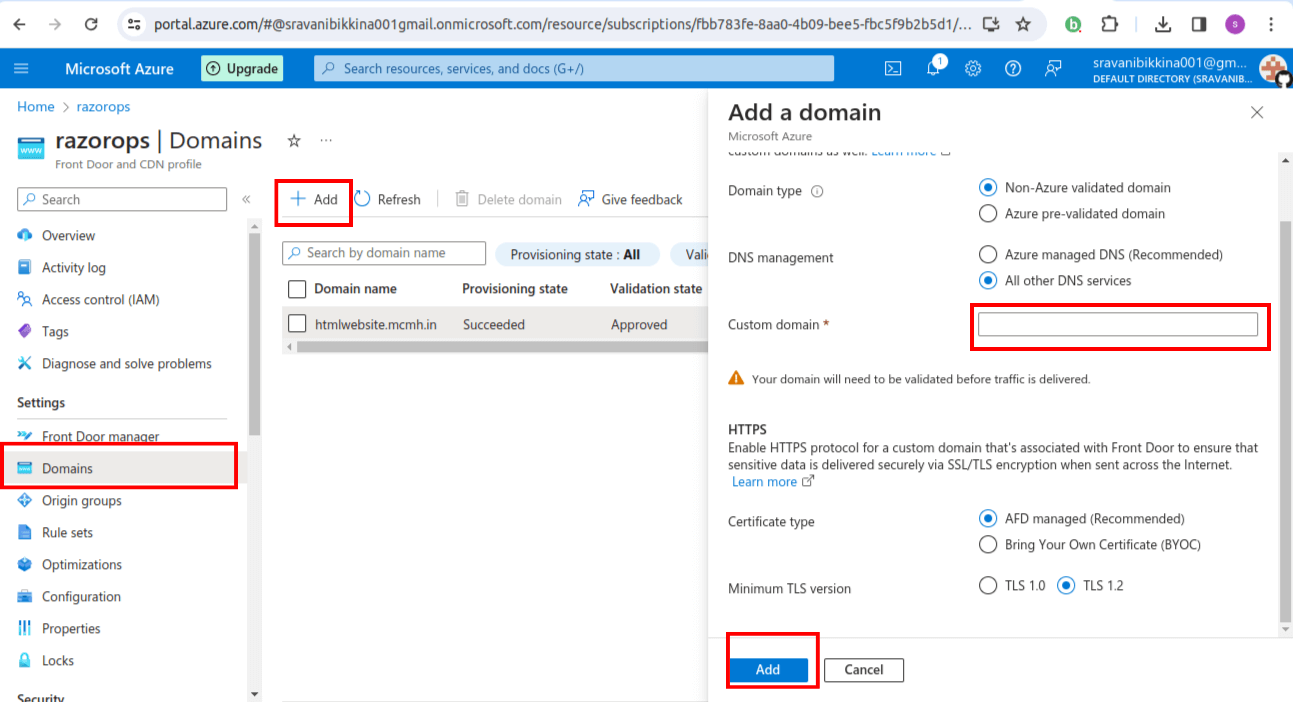
Step 4: Configure Custom Domain and Enable HTTPS
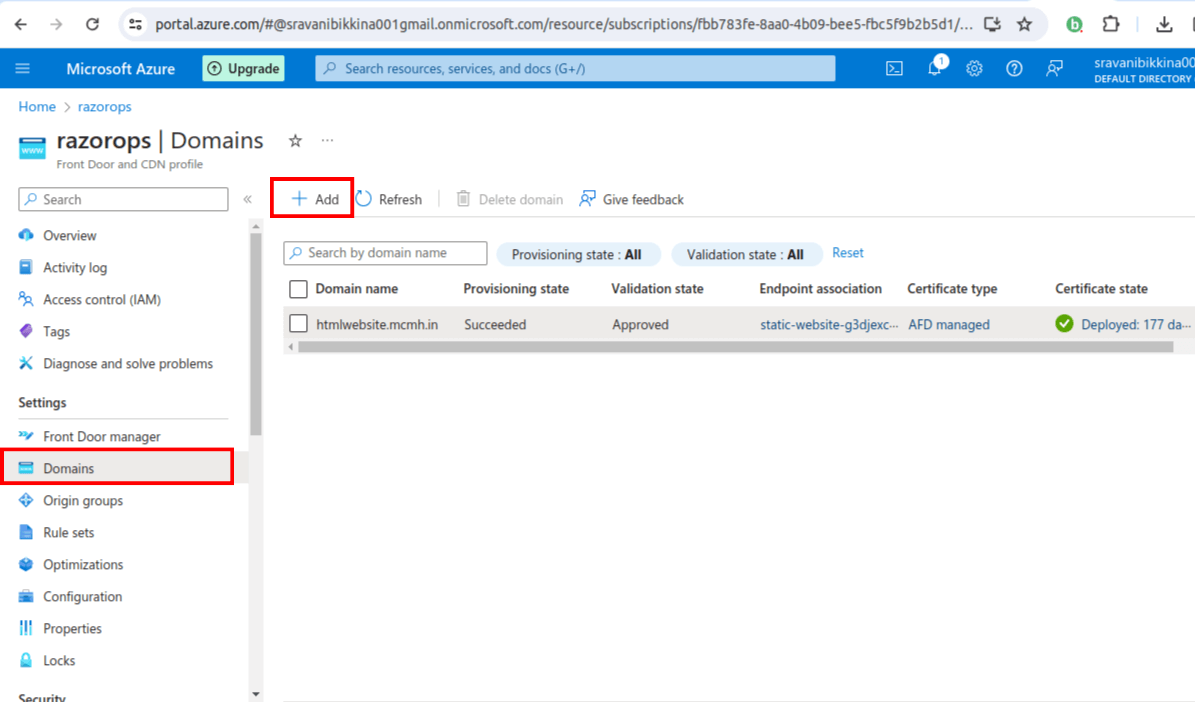
- In the Azure Portal, select the CDN endpoint you created earlier.
- Go to the custom domain feature and click on “Add custom domain”.
- Enter your custom domain name and click on “Add” to add it to the CDN endpoint
Part 3: How to setup FREE Razorops CI/CD for automatic deployment of same Static Website
CI/CD stands for Continuous Integration and Continuous Delivery (or Continuous Deployment). It is a set of practices that involve automatically testing and delivering code changes frequently and consistently. CI/CD aims to improve the software development process by providing automation and feedback at every stage, from code development to deployment.
Razorops CI/CD will help auto upload the new files of the website. To upload files from any CICD system we will need the Azure Access details and use the Azure CLI to copy files and upload to Azure Static Web Site Container.
Step 1: Generate azure credentials
How to generate Azure credentials or service accounts for CICD automation ?
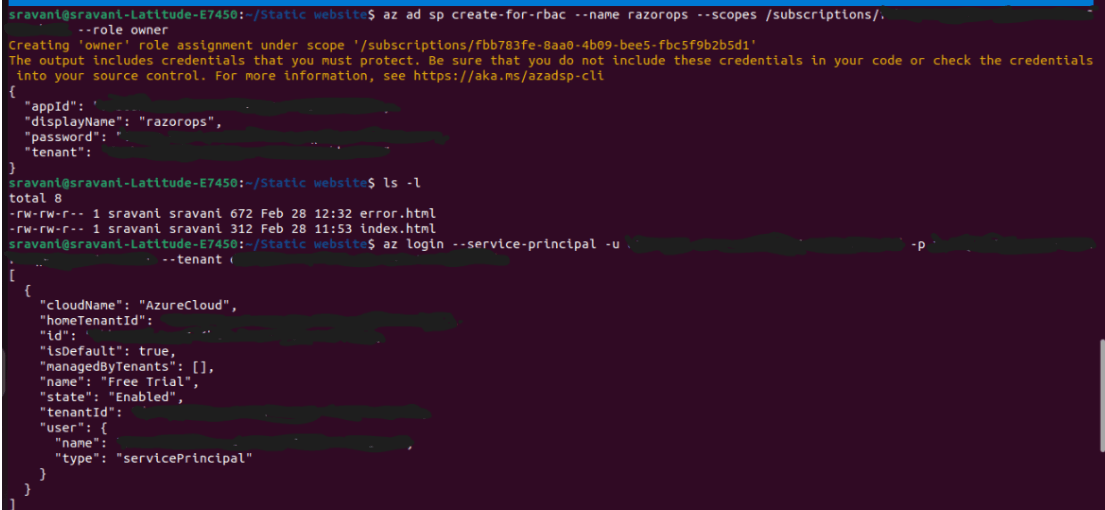
To generate deployment credentials using Azure CLI and set up a service principal, follow these steps:
Step 1: Create a Service Principal
Run the following command in the Azure CLI to create a service principal:
az ad sp create-for-rbac --name <service_principal_name> --role contributor --scopes /subscriptions/<subscription_id>
Save Credentials
Make sure to save the following information
- appId (Application ID) from the service principal creation output.
- password (Secret) from the service principal creation output.
- tenant (Directory ID) from the service principal creation output.
-
<subscription_id>(Your Azure subscription ID).
az login --service-principal -u “appId” -p “password” --tenant “tenant id”
Replace <appId>, <password>, and <tenantId> with the actual values obtained when creating the service principal.
After running this command, you should be authenticated to Azure using the specified service principal, and you can proceed with managing resources using the Azure CLI.
Step 2: Setup the Razorops pipeline
How to Setup the Razorops pipeline
- Create new account with RazorOps CICD
- Create New WorkFlow/Pipeline form Dashboard
- Add .razorops.yaml file in your static website root folder
Signup with your preferred Source code management platform like Github, Bitbucket or Gitlab. https://razorops.com/
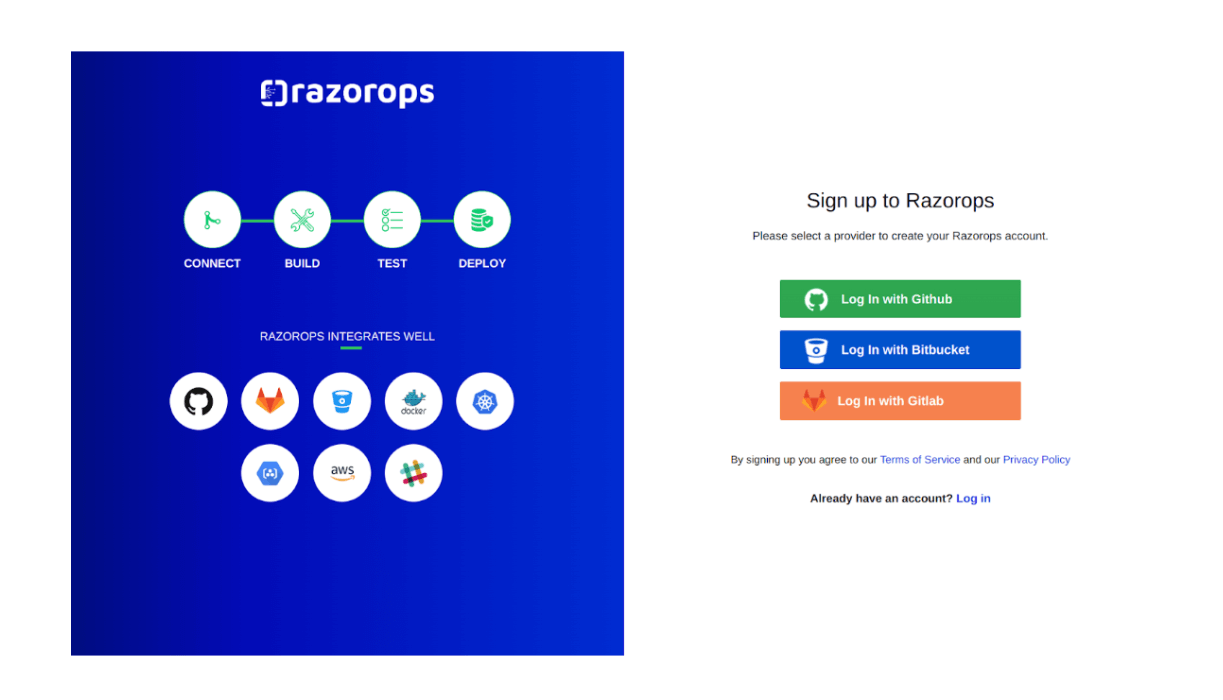
Let’s say you are using github to sign up, after signup you will be land to Razorops dashboard
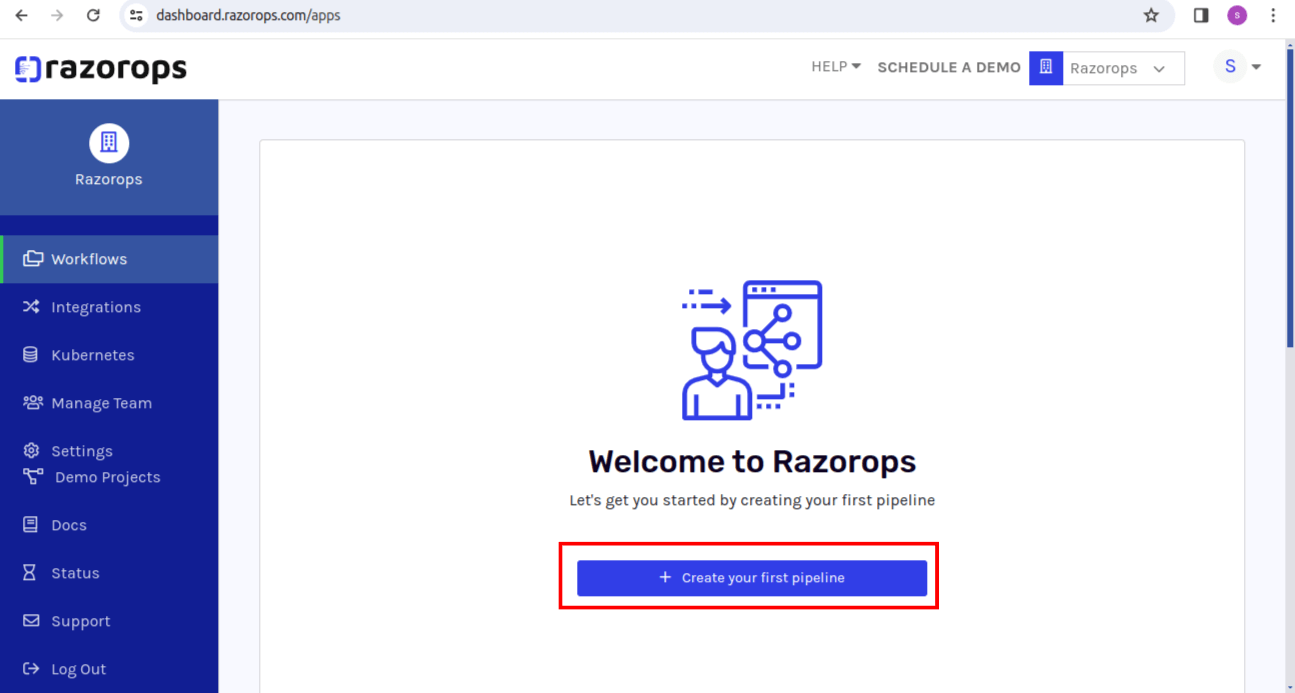
2. Create your first pipeline
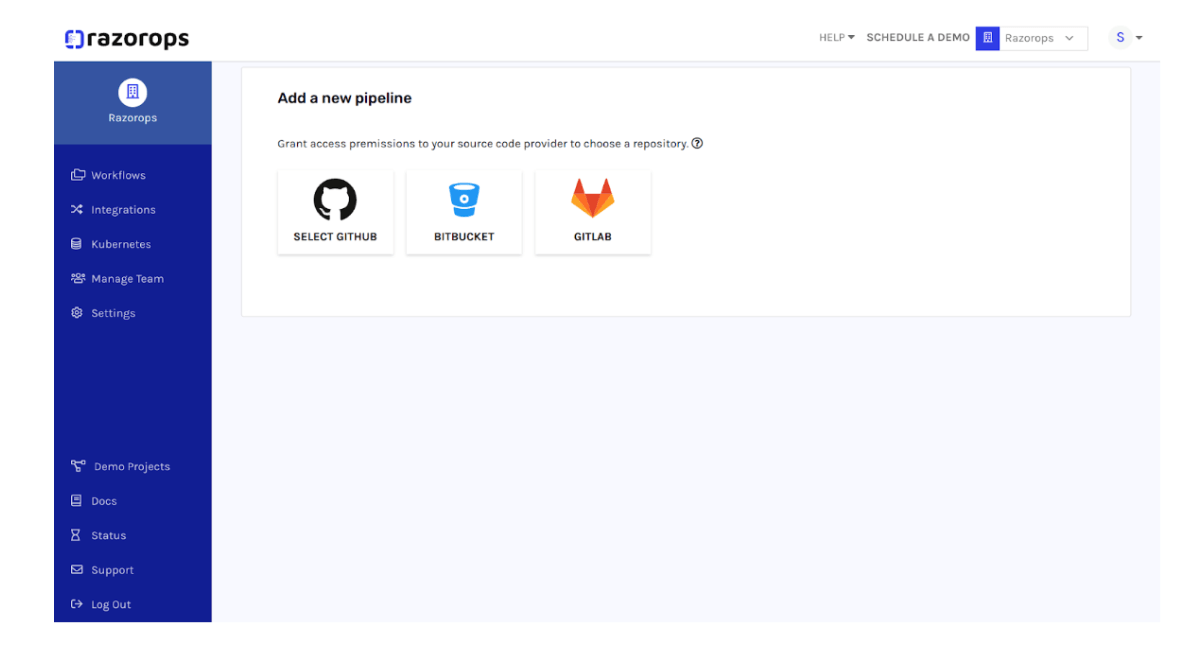
Select GITHUB to create your first pipeline
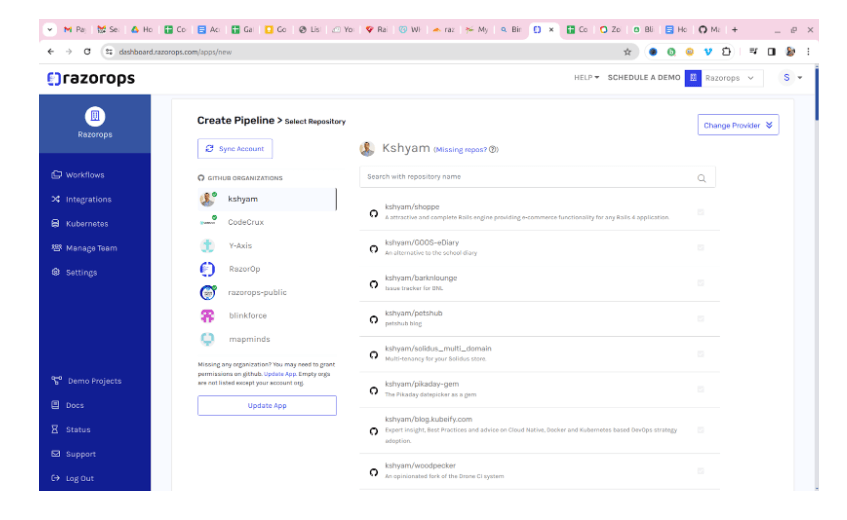
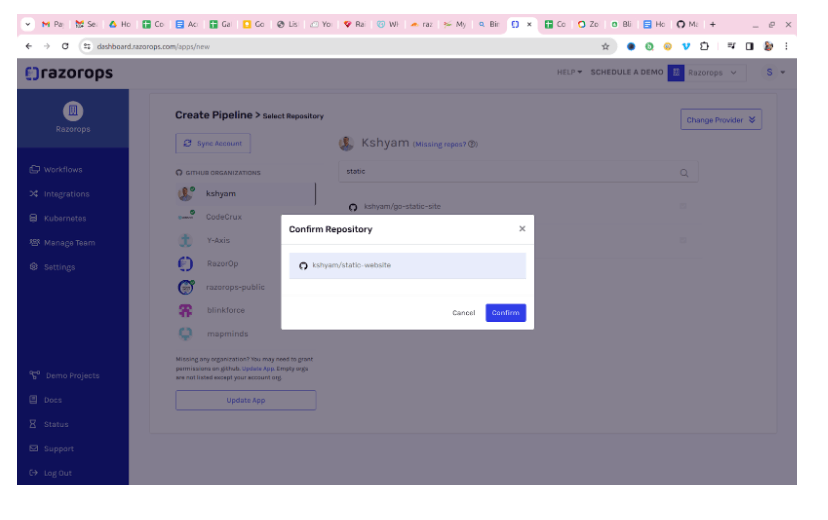
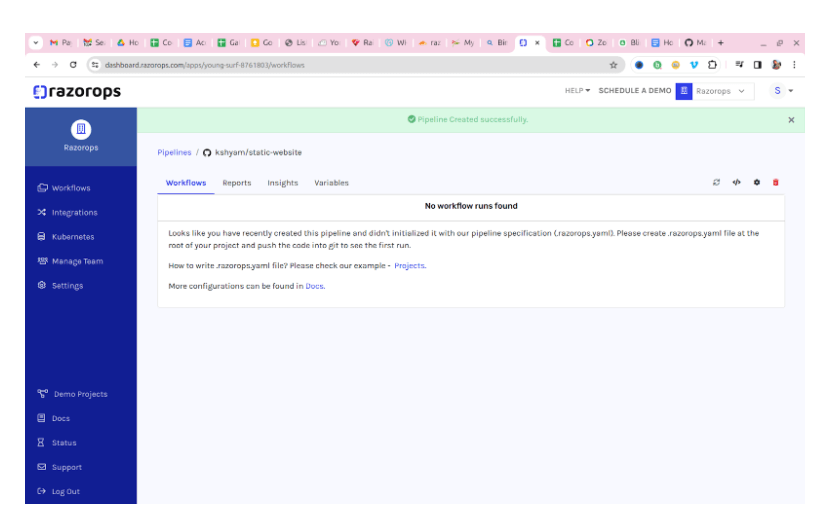
Follow the documents to write CI/CD razorops.yaml file to store files in azure storage account https://docs.razorops.com/
.razorops.yaml
global:
runner:
os_image: ubuntu
tasks:
deploy-to-dev:
steps:
- checkout
- commands:
#access variables from environment variables of razorops pipeline
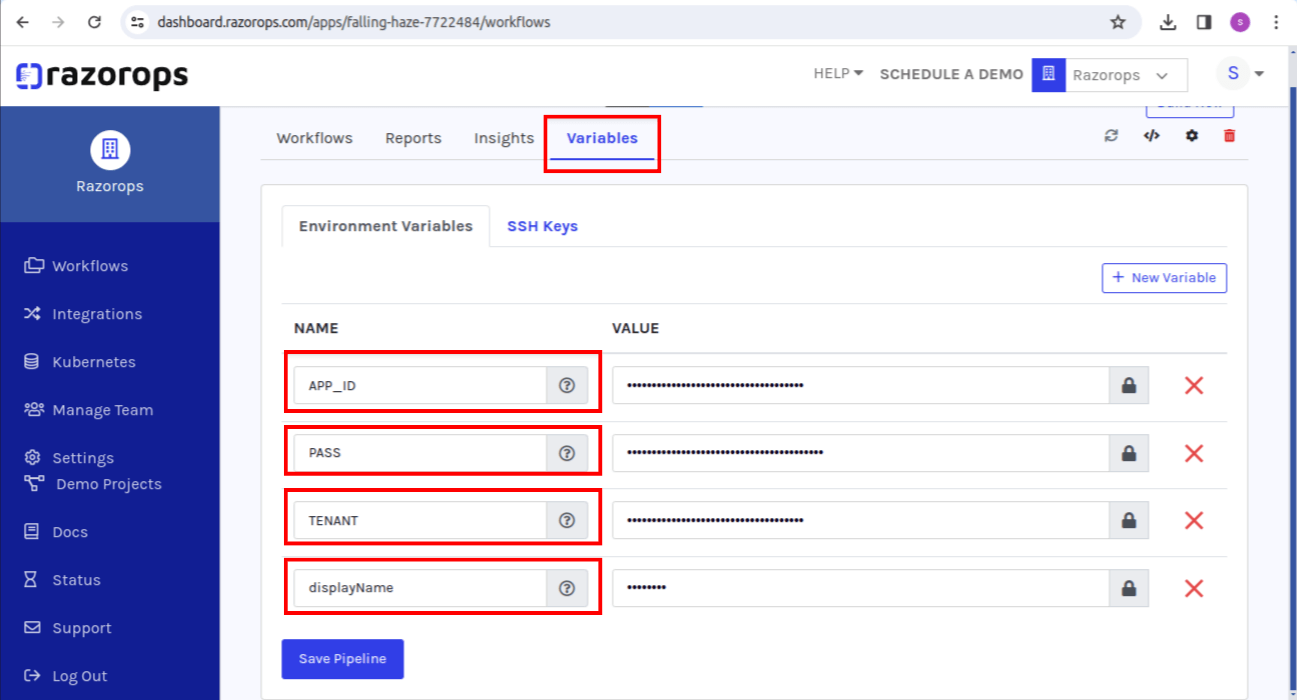
- az login --service-principal -u $APP_ID -p $PASS --tenant $TENANT
- az storage blob upload-batch -s . -d '$web' --account-name razorops --overwrite true
--overwrite true
Use Razorops Variables to securely store the deployment credentials
- Login to Razorops and integrate pipeline using github repo
- Add variables as shown in below image
https://dashboard.razorops.com/
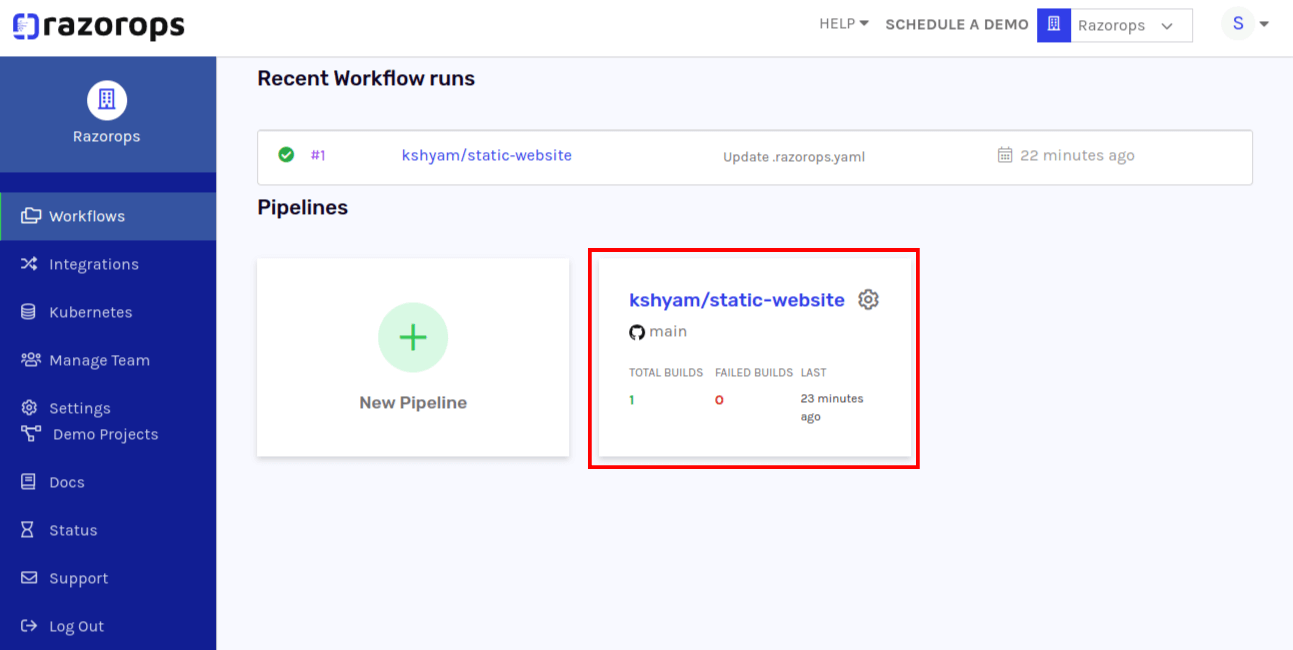
To build the pipeline select on workflows and click on the new pipeline. Click on github and select the repository. pipeline get automatically build and deploy the jobs or task mentioned in razorops.yaml file
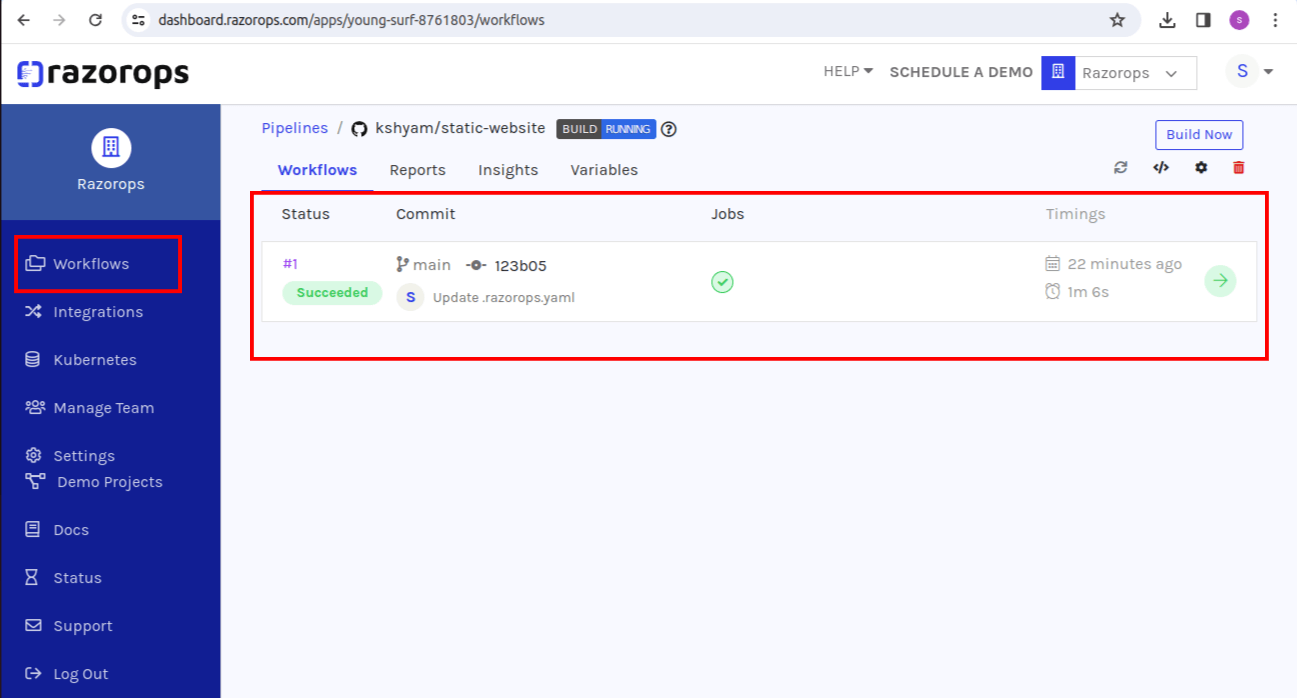
While, pipeline succeeded, go to azure website and can check files uploaded through Razorops in containers of azure storage account. as show below
You can check following github repository for static website code through this link- https://github.com/kshyam/static-website
Conclusion:
Hosting a static website on Azure Storage with a CI/CD pipeline is a straightforward process that brings several advantages. By following these best practices, you can create a reliable and efficient static website infrastructure on Azure. This approach not only simplifies the hosting process but also sets the foundation for scalability and automation, enabling you to focus on creating and delivering content without worrying about infrastructure complexities.


