Migration Guide - Jenkins to Razorops
Organizations are becoming more aware of the advantages of upgrading their continuous integration and continuous delivery (CI/CD) pipelines and moving them to the cloud, from lowering infrastructure costs to eliminating security threats. But carrying out a transfer is challenging, especially when a variety of platforms and technologies are involved.
What is CI/CD?
Continuous Integration (CI) and Continuous Delivery (CD), commonly called CI/CD, is a process that makes it easier and quicker to combine the efforts of different teams to produce a single, coherent product. By providing teams with a single repository to save their work in and automation tools to regularly integrate and test the code to guarantee it functions, CI/CD optimises application development and operations (DevOps) by streamlining the developing, testing, and deployment of applications.
Benefits of the CI/CD pipeline
- Reducing time to deployment through automation
- Decreasing the costs associated with traditional software development
- Continuous feedback for improvement
- Improving the ability to address error detection earlier in development
- Improving team collaboration and system integration
It is important to understand that when you are switching to RazorOps, you get a set of higher level abstractions for your builds:
-
Unlike Jenkins, RazorOps automatically has a distributed fleet of build nodes and manages all builds on its own.
-
With RazorOps, you don’t need to install anything on the build nodes (in fact, you don’t even have SSH access to them). All build tools are automatically launched in pipelines as Docker images.
-
It is possible in Razorops to use the same tools in the same pipeline with a different version without any special configuration (e.g. use Java 5 and Java 8 in the same pipeline).
-
Razorops plugins are used per pipeline by simply mentioning them. There is nothing to install centrally (such as Jenkins plugins or shared libraries). Different teams can use different tools in their pipeline without affecting each other.
-
Razorops plugins are just Docker images with predefined inputs/outputs. They can be programmed in any programming language (not just Java/Groovy) and are not tied to Razorops in any way (i.e. there is no need to know the Razororps API for writing a Razorops plugin).
Migrating Jenkins freestyle jobs
If you have freestyle Jenkins jobs, it is very easy to migrate your builds to RazorOps. In Jenkins, you are accustomed to:
- Install a programming tool on the Jenkins node.
- call it directly in a build step.
For RazorOps a similar process would be the following:
- Find a Docker image on Dockerhub or create one by yourself that has the tools that you need
- Use a freestyle step and run the exact same command in a razorops pipeline
For example: this is Jenkins job:
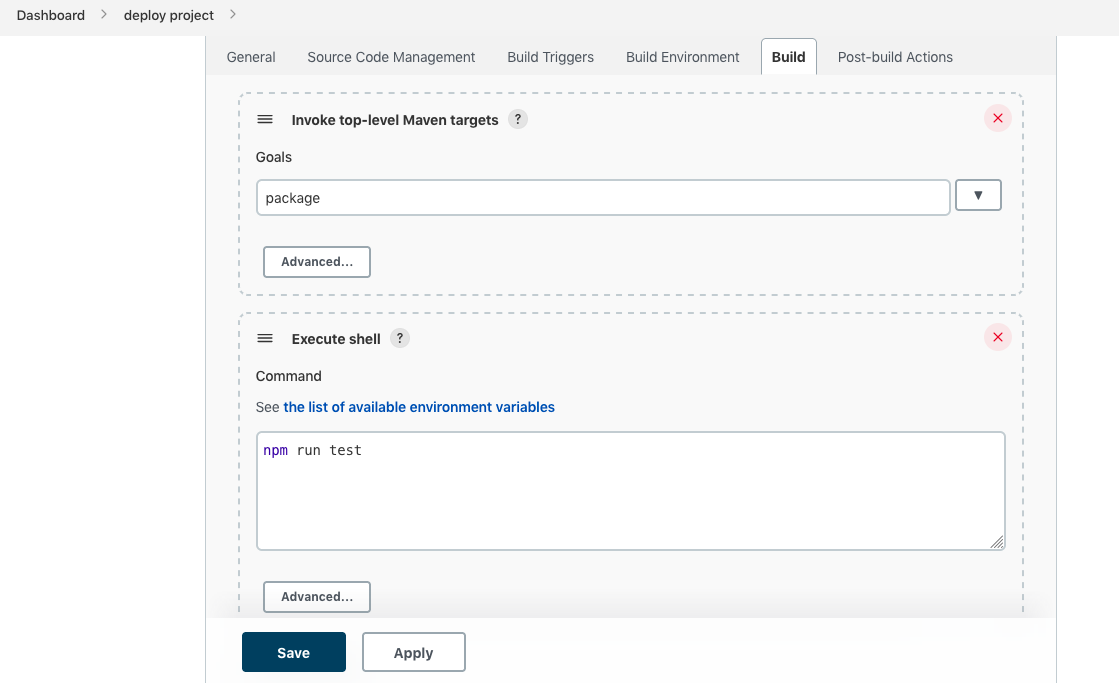
can be easily converted to a RazorOps pipeline like this:
.razorops.yaml:
  npm-test:
     runner: node:11
     steps:
commands:
|
npm  run test
Unlike Jenkins, RazorOps does not need any global installation of tools beforehand
Migrate the sample java based project to RazorOps:
For this project we are using pipeline job. For that, we can install pipeline plugin .
Here, we are using a sample Java project with these steps :
For this project, we are using a pipeline job. For that, we can install a pipeline plugin.
Note : we need to install docker and maven on the Jenkins server for docker and maven operations.
Command for docker installation :
Sudo apt install docker.io -y
Command for maven installation :
Sudo apt install maven -y
Steps for install plugins:
Login to jenkins -> manage jenkins -> manage plugins -> select available ->Search for pipeline plugin ->select plugin -> install plugin without restart
Plugin image :-

-
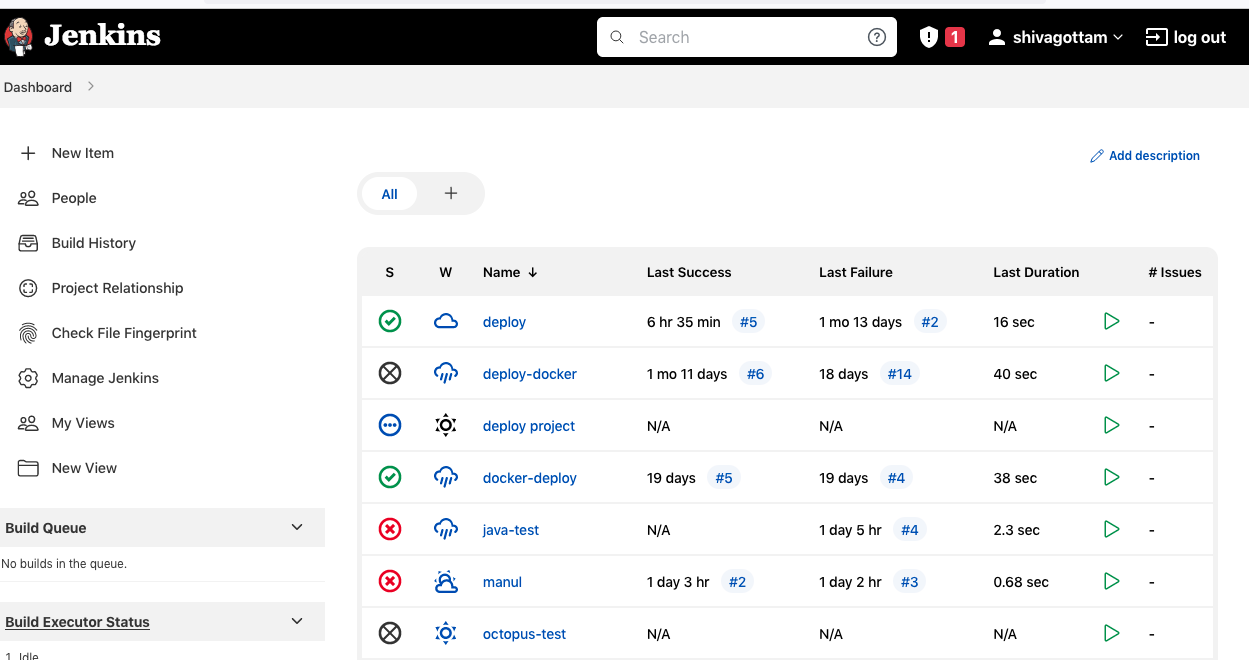
Next move to dashboard :
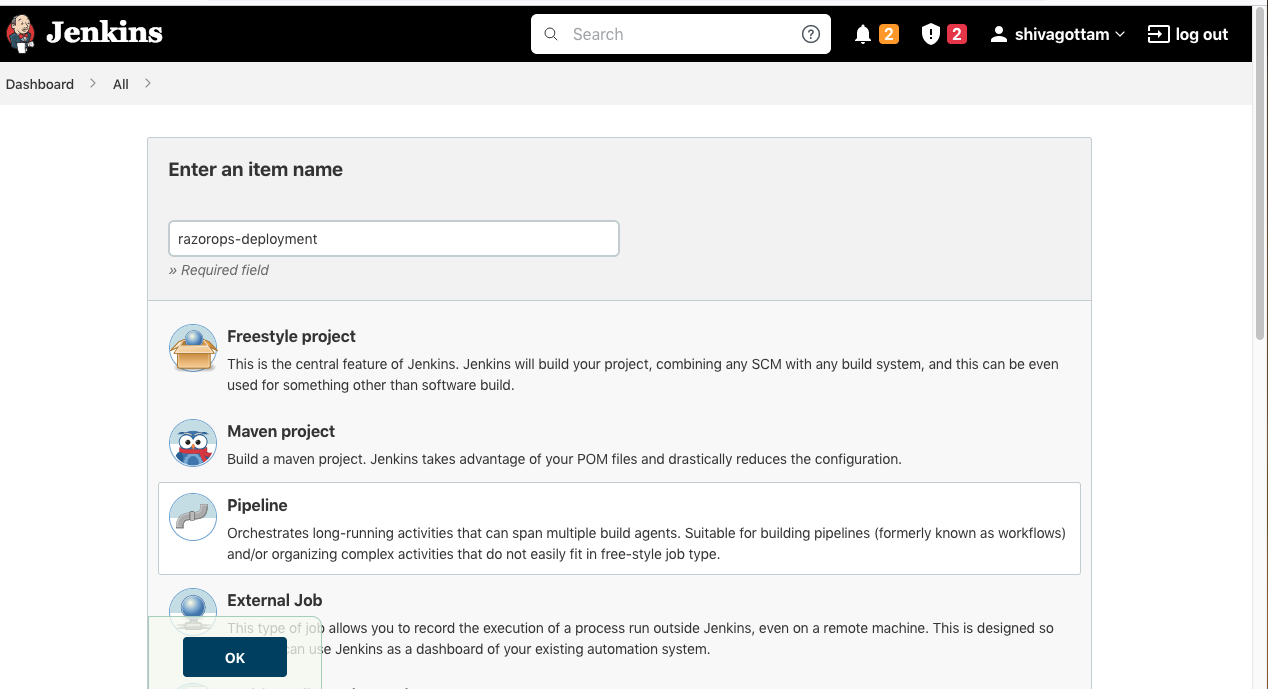
Select New item
-
Enter the field ( with name ):
Select the pipeline option AND click on OK.
Now you arer in pipeline job general stage.
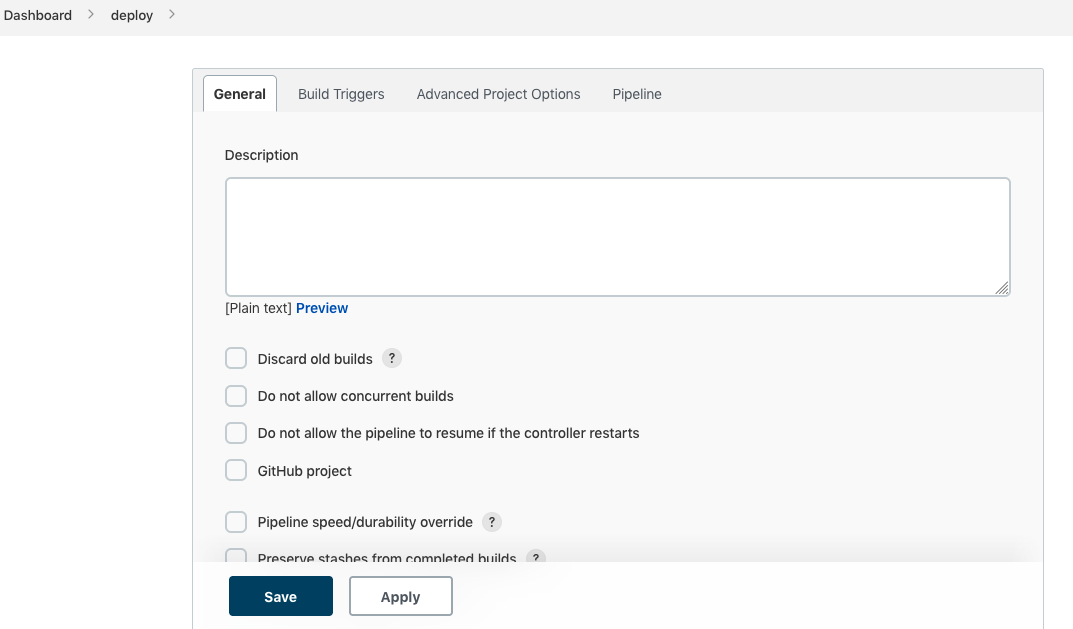
Move pipeline option and enter your pipeline script.
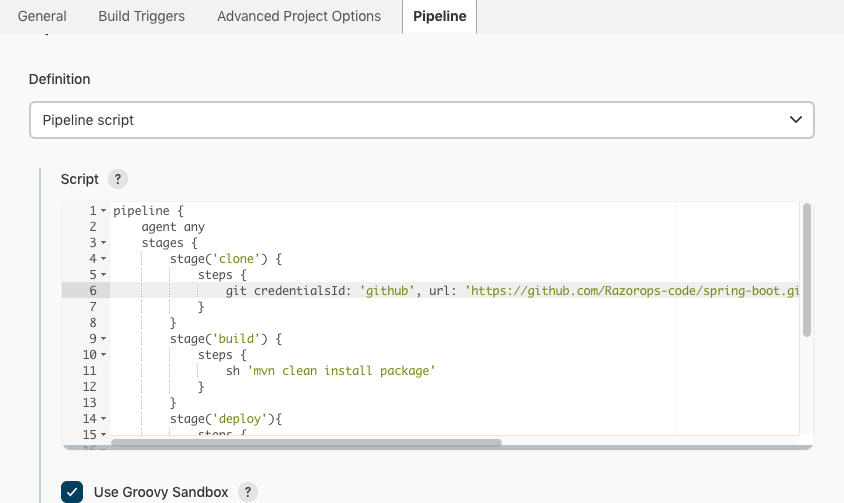
- In above script we have different stages :
i.e:-
- Clone the code from github repository
- Note : Follow this steps to setup github repository credential in global credential sections. Then only we can access the github repository code in jenkins
Steps: Go to manage jenkins > select credentials > select add credentials > assign credentials with username and password
- Make the war file with jenkins using maven command
- Deploy the sample application .war file to apache-tomcat
-
we need to assign tomcat-server credentials to jenkins global credentials section as SSH agent
-
Steps: Go to manage jenkins → select credentials → select add credentials → assign credentials with SSH username with private key → add private key in private key section
-
In the above process we used jenkins pipeline job method , for that purpose we create jenkins file in the format of declarative method with different stages .
Stages:
Clone :
Clone the code from github repository with global credentials
Build :
Build the code with maven plugin in jenkins plugin stage and create a .war file
* We could install maven plugin in manage plugin section
Deploy:
Deploy the the .war into apache tomcat server with scp command
Pipeline code :
pipeline {
    agent any
    stages {
        stage('clone') {
            steps {
                git credentialsId: 'git', url: 'https://github.com/shivagottam/spring3-mvc-maven-xml-hello-world.git'
            }
        }
        stage('build') {
            steps {
                sh 'mvn clean install package'
            }
        }
        stage('deploy'){
            steps {
            sshagent([‘sshagent’]) {
                sh 'scp -o StrictHostKeyChecking=no target/spring3-mvc-maven-xml-hello-world-1.2.war [email protected]:/opt/apache-tomcat-8.5.81/webapps'
              }
         }
       }
    }
}
When we click Build now option pipeline job run and execute like bellow
NOTE : If we get permission denied demon socket unix:///var/run/docker.sock

Output of pipeline stages :
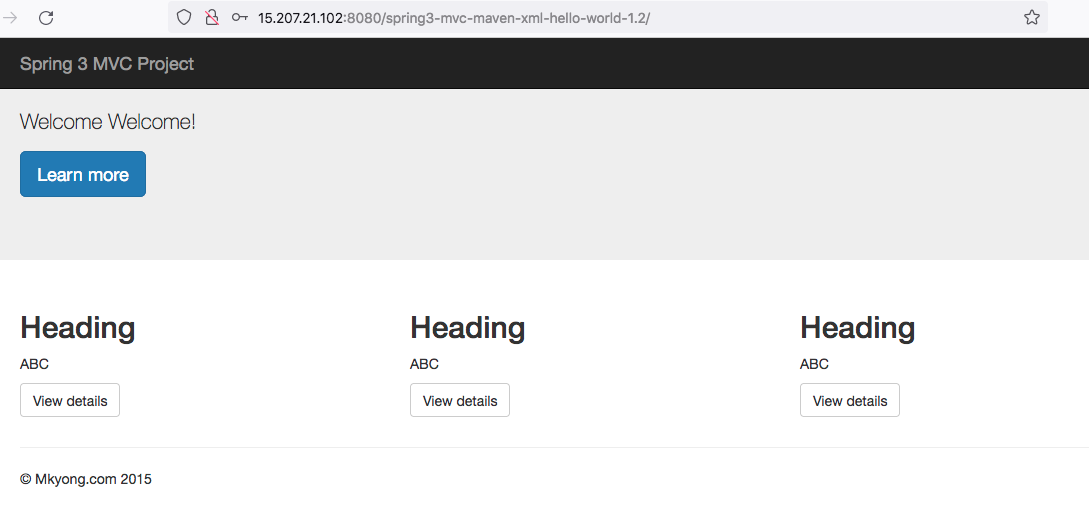
Now connect to the tomcat server with < host address >:8080
Output of sample application on server:
Migration of same project in RazorOps :-
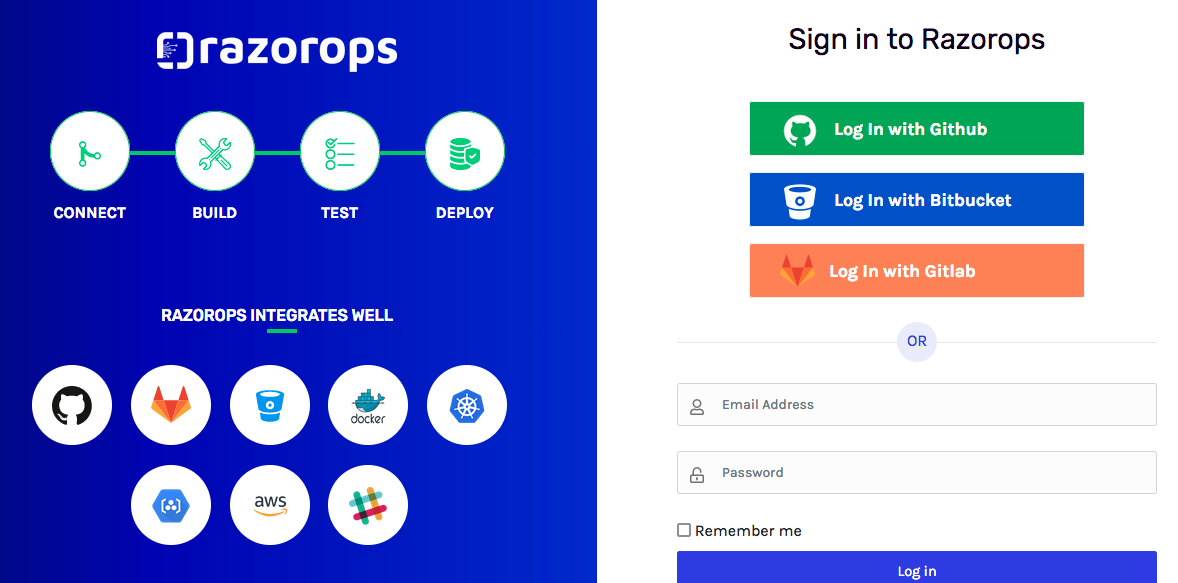
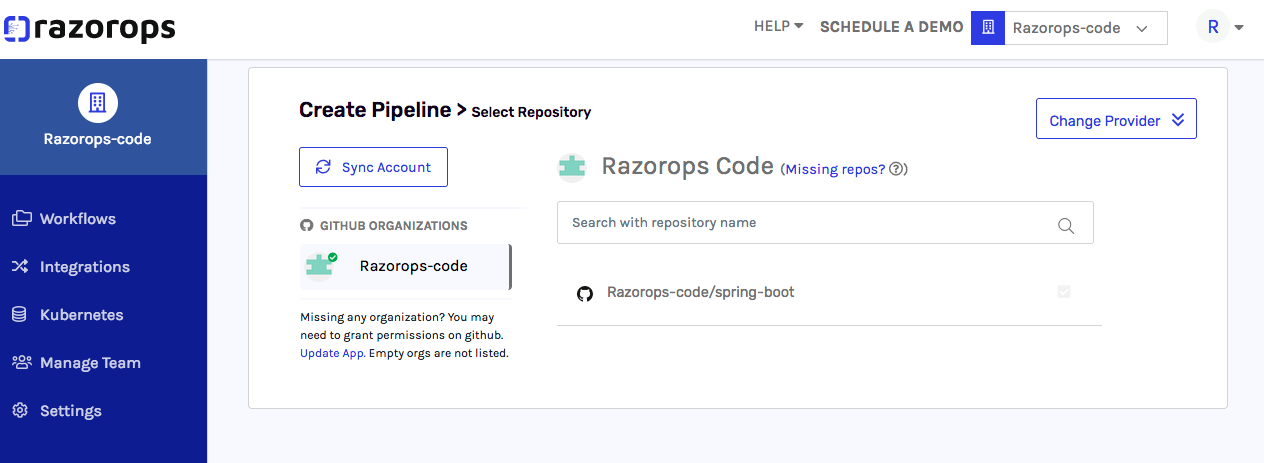
Login to RazorOps with repository(github/bitbuket/gitlab):-
Here we login with github:
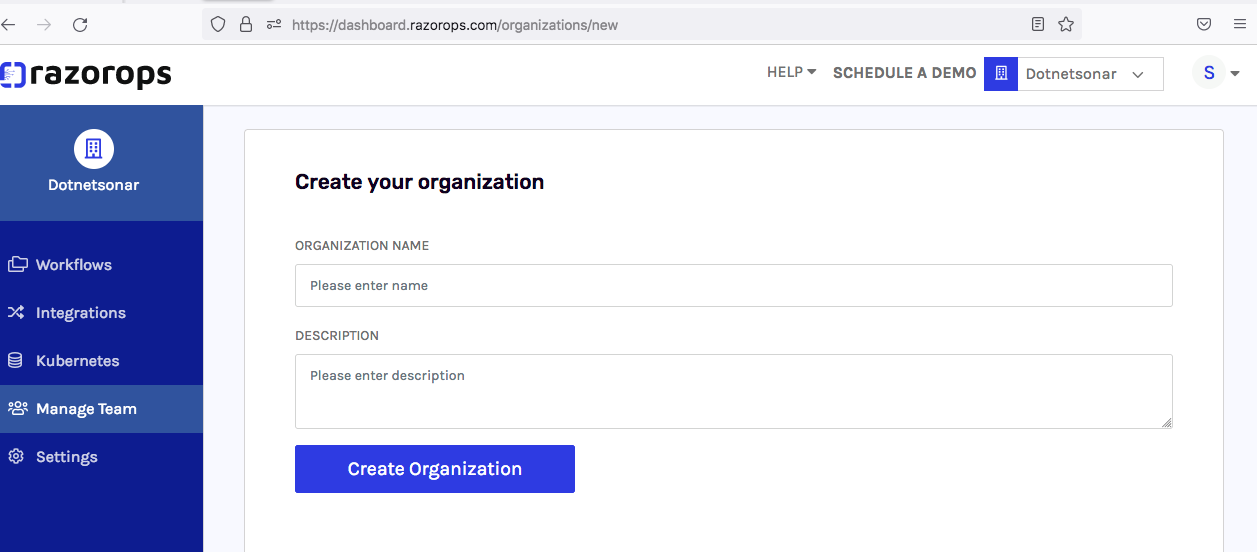
After successful login if we create same new project, we move to new organization at the top right hand side. Now click on new organization
Created organization with name and description:
Next add github:
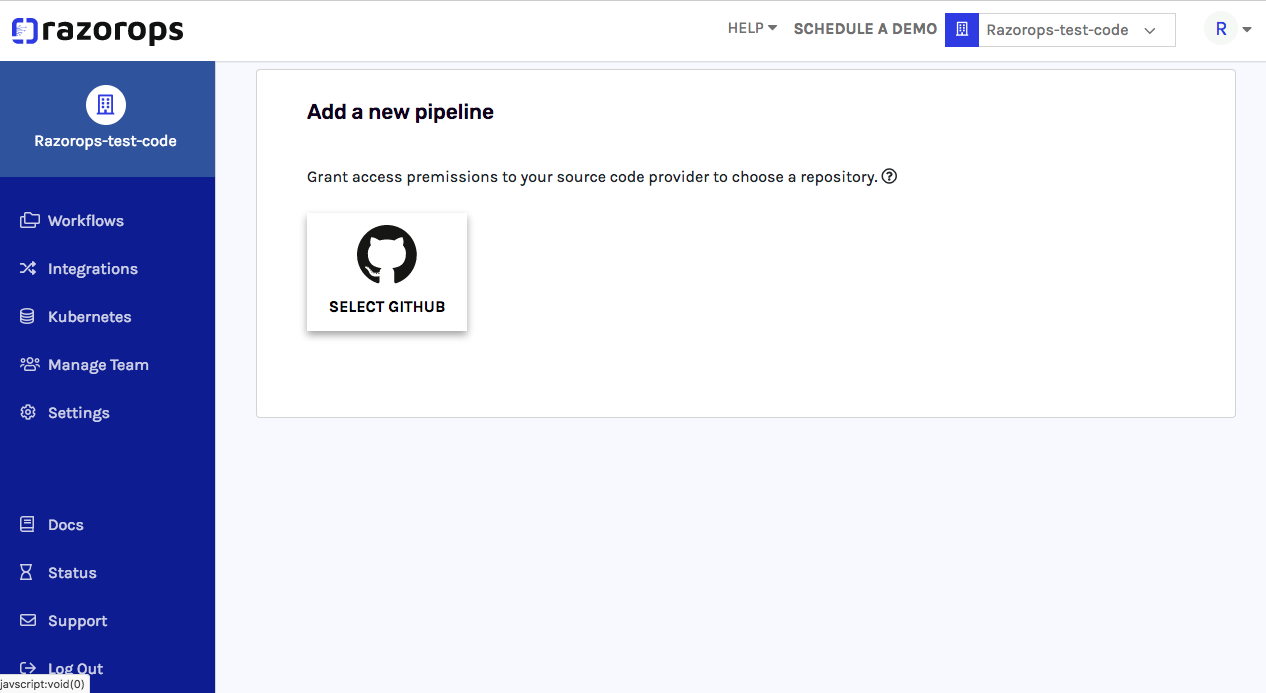
Give the permission to the GitHub repository which has the .razorops.yaml file
Click project repository
Next you move to workflow process and enter your .razorops.yaml pipeline script
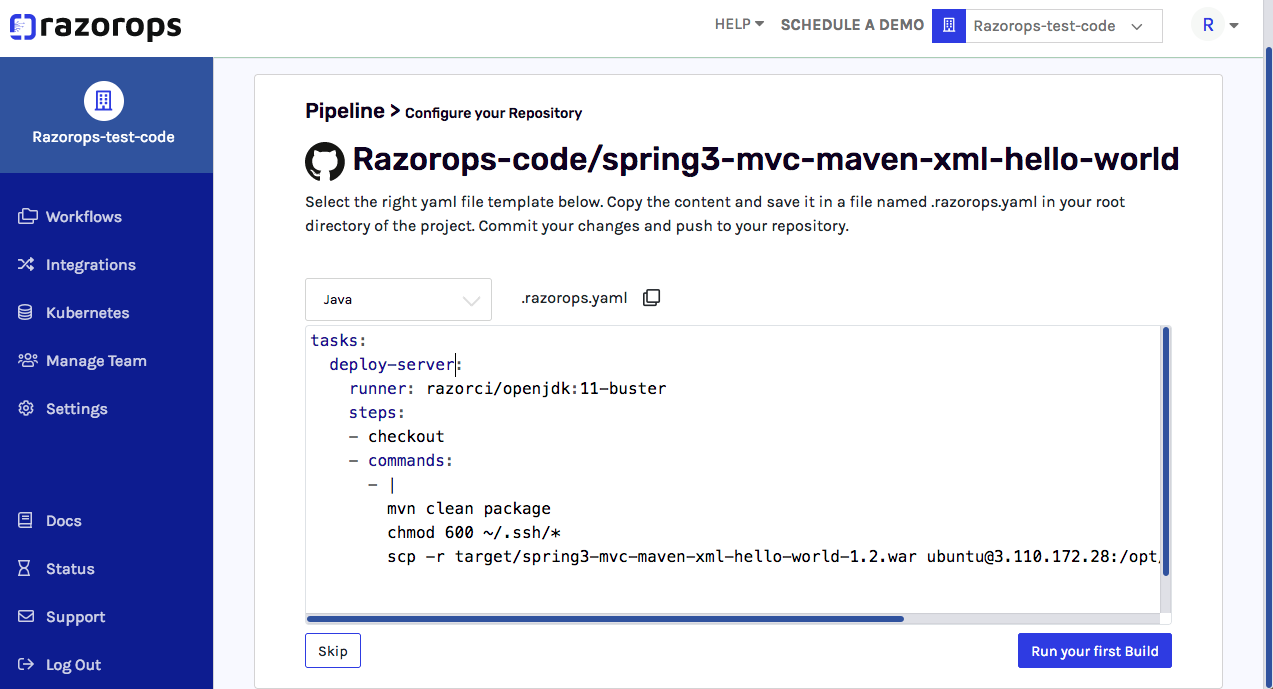
Click on Run your first build
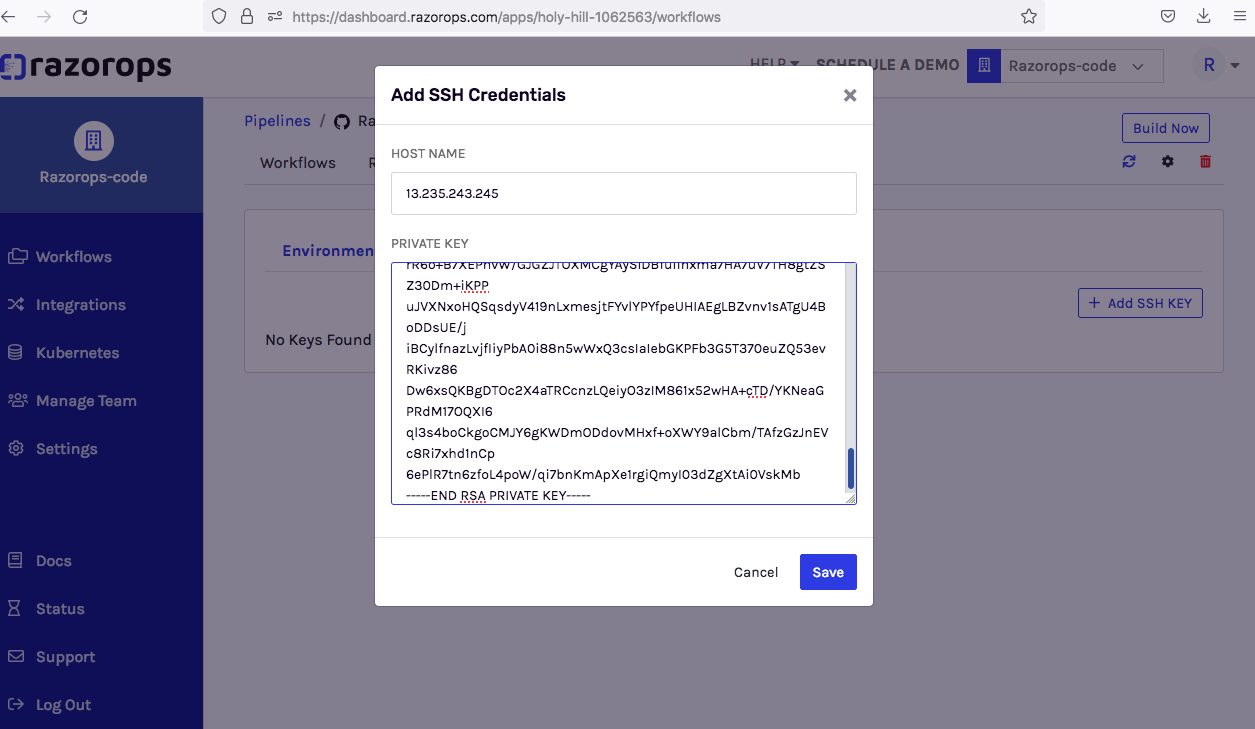
NOTE: add SSH key of tomcat server in variable section for connecting with tomcat server
Steps: Go to workflows → select variable section → in variables add ssh key with public ip and private key
Next, automatically start the workflow process.
We have are over head maintaining of plugins and their process in jenkins but in RazorOps we just use .razorops.yaml file we can set entire deployment process In a single file.
Here we do not need to install additional settings and plugins in RazorOps , everything will be supported and available in RazorOps.
Here we have razorops.yaml file :
tasks:
unit-test:
runner: razorci/openjdk:11-buster
steps:
- checkout
- commands:
- |
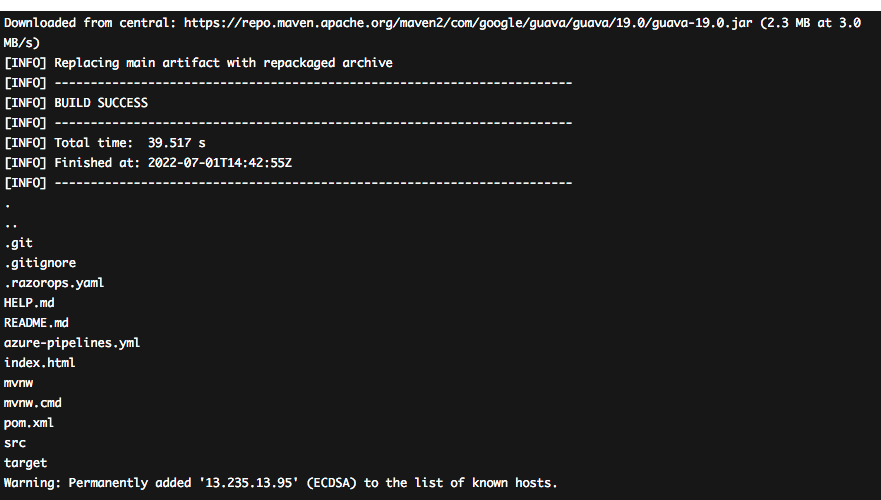
mvn clean package
ls -a
chmod 600 ~/.ssh/*
scp -r target/spring3-mvc-maven-xml-hello-world-1.2.war [email protected]:/opt/apache-tomcat-8.5.81/webapps
After successfully running the pipeline, we can find the logs in
Here is a simple process to migrate a project from Jenkins .
Output of sample application on server with RazorOps:
Jenkins increases the overhead of maintaining the infrastructure and keeping the entire set of tools updated. There is an enormous range of plugins available for integrating various tools and services with the workflow.
Sample project with deploying to docker container with Jenkins :
Containerization : allows developers to create and deploy applications faster and more securely
Containers improve efficiency in two ways: they use all available resources, and they minimize overhead. When properly configured, containers allow a host to take advantage of virtually all available resources.
We can use the same process for creating jobs and plugins.
Here, we using sample Java project with these steps :
Clone : Clone the code from github repository with global credentials.
Build package : Build the code with maven plugin in jenkins stage and create a .war file
Build image : build the image with using of Dockerfile
Push to repository: push the image from local to docker hub repository
-
Note : Follow this steps to setup Dockerhub repository credential in global credential sections Then only we can access the Dockerhub repository code in jenkins
-
Steps: Go to manage jenkins > select credentials > select add credentials > assign credentials with username and password
Pull from repository and Run as a container with docker :
Download the image and run the container with using of same image
Pipeline code :
pipeline {
agent any
environment {
DOCKERHUB_CREDENTIALS = credentials('docker-hub')
}
stages {
stage('SCM Checkout') {
steps{
git 'https://github.com/Razorops-code/spring-boot.git'
}
}
stage('build war file') {
steps{
sh 'mvn clean install package'
}
}
stage('buld docker image'){
steps {
sh 'docker build -t razoropsrepocode/spring:v1 .'
}
}
stage('login to dockerhub') {
steps{
sh 'echo $DOCKERHUB_CREDENTIALS_PSW | docker login -u $DOCKERHUB_CREDENTIALS_USR --password-stdin'
}
}
stage('push image') {
steps{
sh 'docker push razoropsrepocode/spring:v1'
}
}
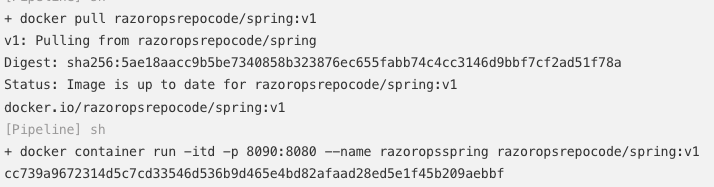
stage('run container') {
steps{
sh 'docker pull razoropsrepocode/spring:v1'
sh 'docker container run -itd -p 8090:8080 --name razoropsspring razoropsrepocode/spring:v1'
}
}
}
post {
always {
sh 'docker logout'
}
}
}
NOTE: If we get error like permission denied demon socket unix:///var/run/docker.sock
Solution: We can give full permission to docker.sock
Sudo chmod 777 /var/run/docker.sock
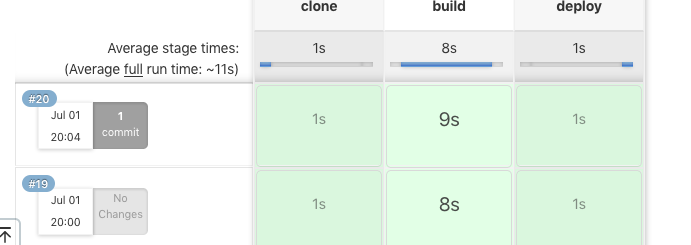
Output of pipeline stages :
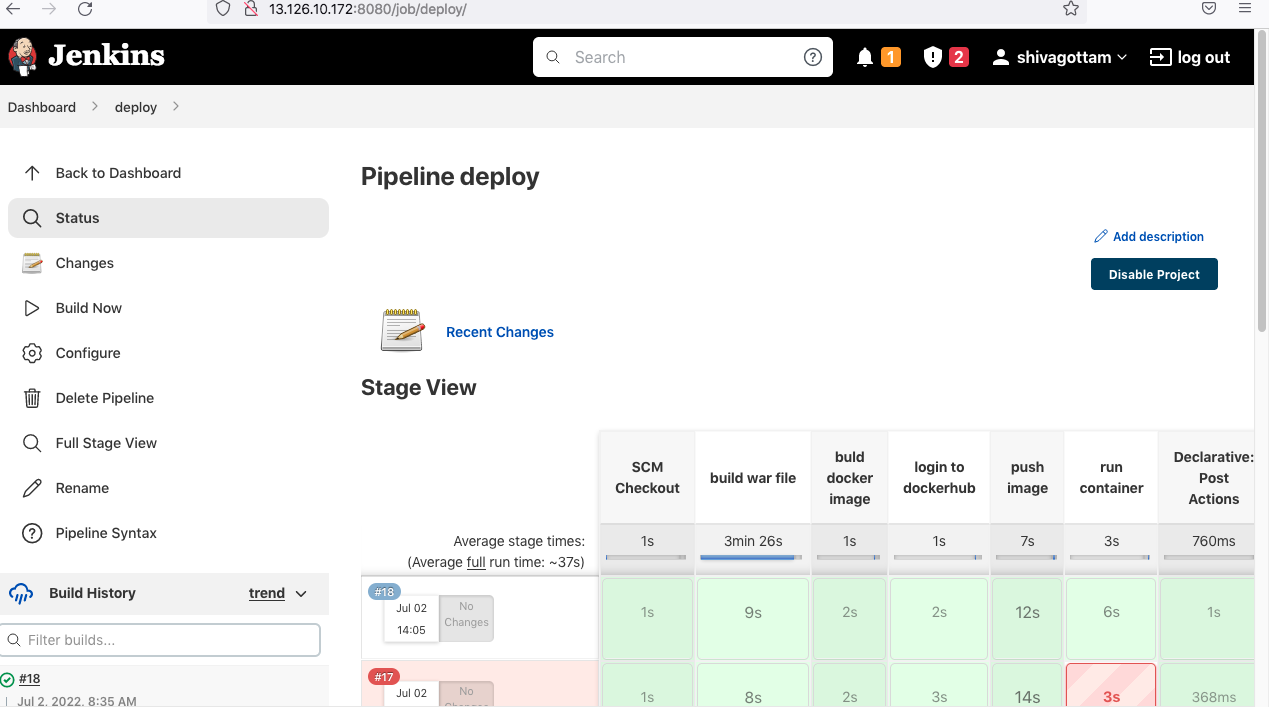
Console output:
Output of sample application on server
Sample project with deploying to docker container with RazorOps:-
Here we implemented same project in RazorOps cicd tool
Step-1: login to RazorOps as per above login process
Step-2 : create .razorops.yaml file have runner and and build operations
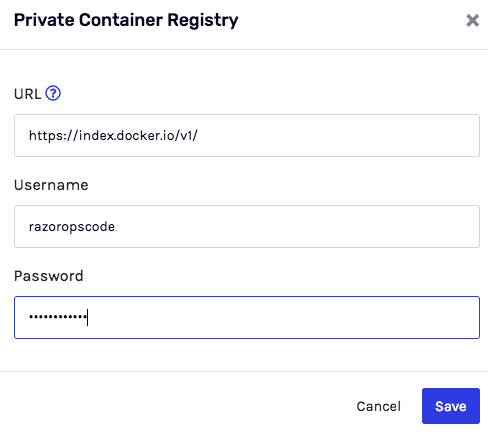
Step-3: integrate the docker hub with integration option
Add registry details:
.razorops.yaml:-
tasks:
  unit-job:
    runner: razorci/openjdk:11-buster
    steps:
    - checkout
    - commands:
      - |
        mvn clean package                  # build the package
        ls -a
        ls target
    - docker/build:
        image: shivaladdu/razorops       # build the image with Dockerfile
        push: true                                 # push image to docker hub repository
Which is integrated
        tags: ["latest-v2"]                     # with image tag
Dockerfile:
FROM tomcat:8.0.20-jre8 COPY target/spring3-mvc-maven-xml-hello-world-1.2.war /usr/local/tomcat/webapps/spring3.war
Step-4 : we can run the build build process run automatically create the package and create an image with the use of dockerfile and push into the docker hub repository.
Build status:

Logs of build:
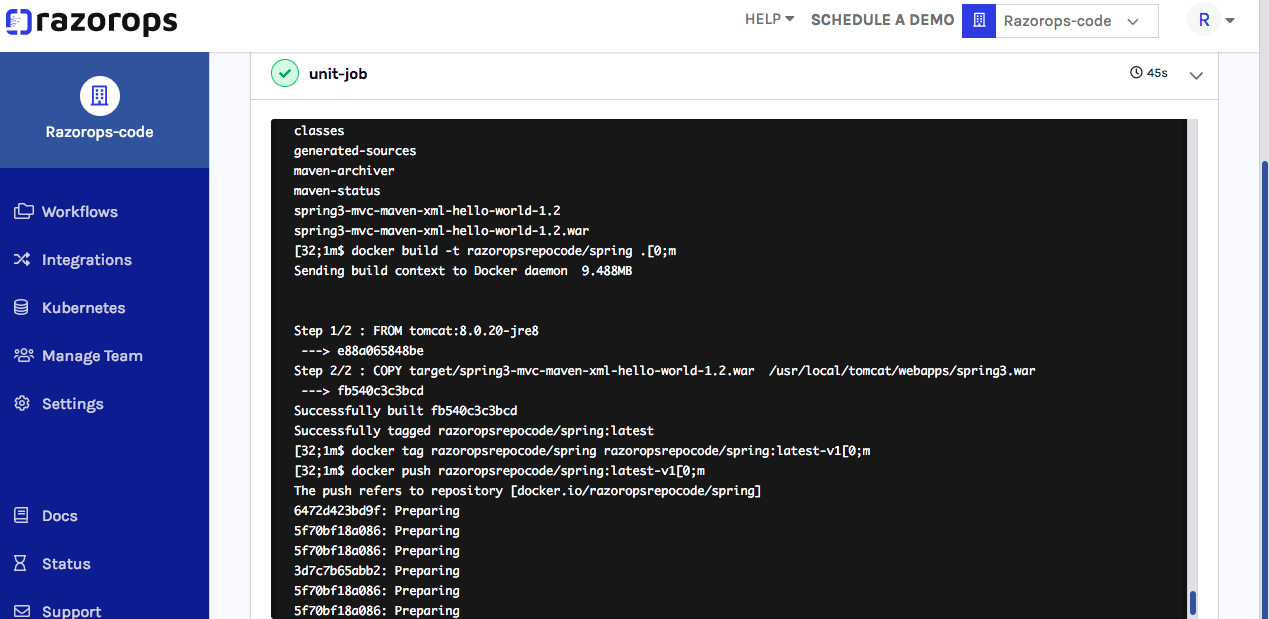
Image push into docker hub with tag latest-v2:
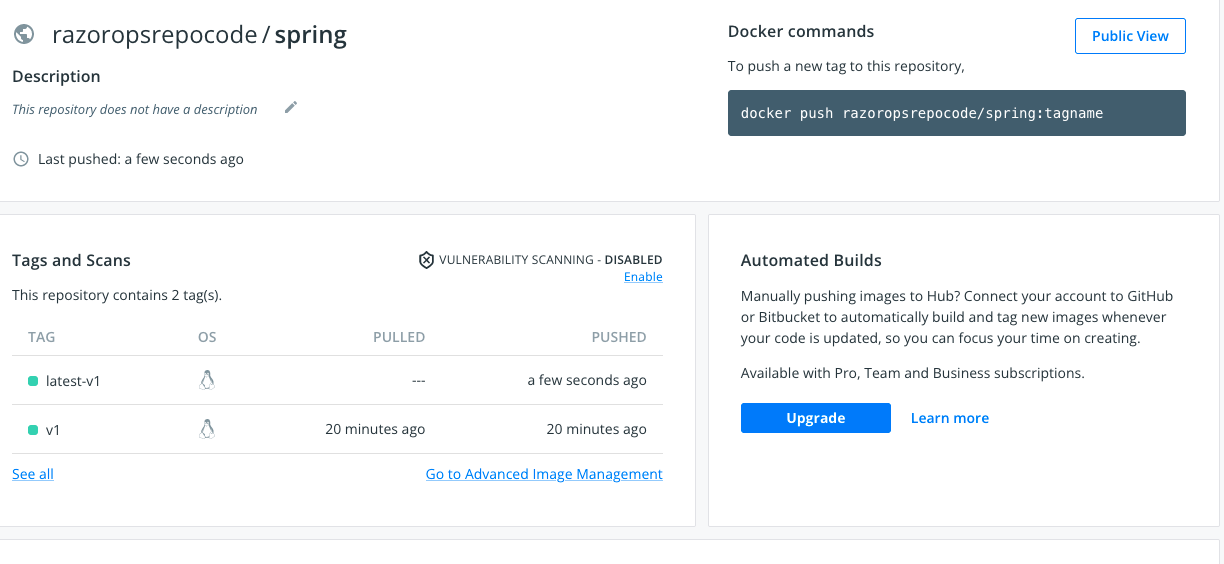
We can clone the image and run it on different platforms like web servers or kubernetes, and so on .
So, we do not need to concentrate on environment setup and supported plugins, unlike with Jenkins.
With the use of a single .razorops.yaml.file we can complete the entire process of CICD.